Rocket.Chat integrations let you connect external tools and services to your workspace using webhooks. Integrations enable automated message delivery, event notifications, and data exchange between Rocket.Chat and other systems.
There are two types of integrations:
Incoming integrations: Receive data from external services and post messages into Rocket.Chat rooms.
Outgoing integrations: Send data from Rocket.Chat to external services when specific events occur.
Both integration types support custom JavaScript scripting for advanced data transformation and processing. Scripts run in an isolated virtual machine (VM) environment for security.
For deeper integrations beyond messaging, consider using Rocket.Chat Marketplace Apps. You can also manage integrations programmatically using the Integration API.
Incoming integrations
Incoming integrations allow external applications to send data into Rocket.Chat. When you create an incoming integration, Rocket.Chat generates a unique webhook URL. External services can send HTTP POST requests to this URL to deliver messages or data into one or more rooms.
Common use cases
CI/CD notifications
Monitoring and alerting systems
Custom APIs and internal tools
Key capabilities
Incoming integrations support the following features:
Post messages from external services (for example, CI/CD pipelines, monitoring tools, or APIs)
Rich message formatting, including attachments, colors, and structured fields
Custom JavaScript scripts for transforming incoming data
Posting to multiple channels from a single integration
Create an incoming integration
To create a new incoming integration:
In your workspace, go to Manage
.png) → Workspace → Integrations.
→ Workspace → Integrations.Click New in the top-right corner.
Select the Incoming tab.
Under the Settings tab, enable the Enabled toggle.
Configure the required settings:
Field | Description |
|---|---|
Name | A descriptive name to help you identify this integration in the list. |
Post to Channel* | The destination for messages sent by this integration. Enter: • • |
Post as* | The username that appears as the sender of the message. The selected user must meet the following requirements:
For information on creating users, see the Manage Workspace Users guide. |
Alias | An optional display name that appears instead of the username when messages are posted. |
Avatar URL | A URL to an image used as the avatar for messages sent by this integration. This overrides the default avatar. |
Emoji | An optional emoji to use as the avatar instead of an image. See the emoji cheat sheet for supported values. |
Allow to overwrite destination channel in the body parameters | Allows the integration payload to override the Post to Channel setting by specifying a channel or user in the request body. |
Script Enabled | Enables custom JavaScript processing for incoming requests. Scripts run in an isolated VM environment and allow you to transform or validate incoming data before it is posted. |
Script | The JavaScript code executed when a request is received. Use this field to customize message content or routing. For example, see Script for incoming integration. Note that class method bodies execute in strict mode. To ensure compatibility, refer to the Script compatibility section. |
Click Save.
Access incoming webhook integration details
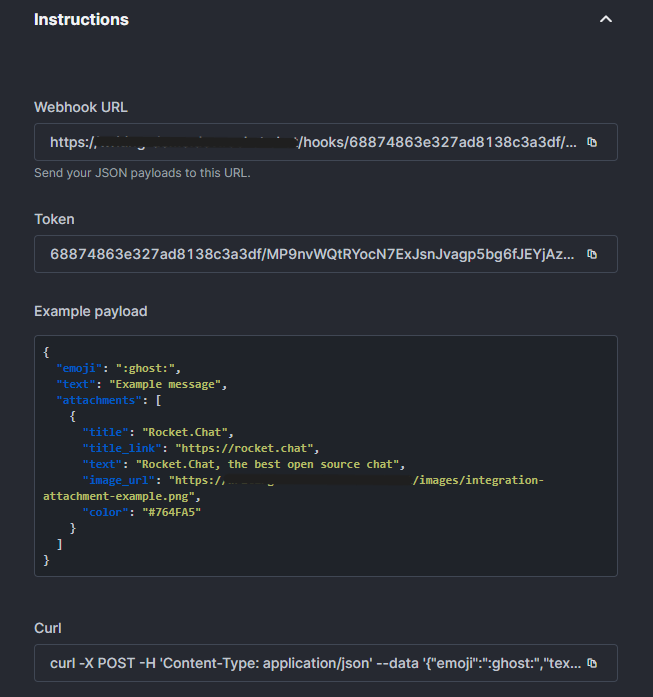
After you click Save, Rocket.Chat automatically generates the integration details and displays them in the Instructions section above. These details are required to connect your external service to Rocket.Chat.
The Instructions section includes:
Webhook URL: A unique endpoint where external services can send HTTP
POSTrequests.Webhook token: A token used to authorize requests sent to the webhook.
Example payload: A sample JSON payload showing how to format a message, including text, emojis, and attachments.
cURL example: A ready-to-use
curlcommand you can run to test the webhook and verify that messages are delivered successfully.
Test an incoming integration
After creating an incoming integration, you can test it by sending a request to the generated webhook URL.
Webhook URL format
Each incoming integration uses a webhook URL in the following format:
https://{your-server}/hooks/{integrationId}/{token}Incoming integrations use the Post Message endpoint. The request body must follow the Post Message payload schema.
Send a test request
The Instructions section provides a ready-to-use cURL command containing your workspace URL, integration ID, webhook token, and a sample payload. Copy the generated command and run it from your terminal.
You can also send a POST request to the webhook URL using curl following this example:
curl https://{your-server}/hooks/{integrationId}/{token} \
     -X POST \
     -H 'Content-Type: application/json' \
     --data '{
       "emoji": ":ghost:",
       "text": "Example message",
       "attachments": [
         {
           "title": "Rocket.Chat",
           "title_link": "https://rocket.chat",
           "text": "Rocket.Chat, the best open source chat",
           "color": "#764FA5",
           "fields": [
             { "title": "Owner", "value": "John Doe" },
             { "title": "Type", "value": "New Contributor" }
           ]
         }
       ]
     }'
If the integration is configured correctly, you will receive the test message in the rooms where you want to post. The following screenshot shows the displayed test message:
.png)
If you don’t receive this message, try disabling the Script Enabled option in the integration settings. Once you’re done, enable it again to use the integration.
Script for incoming integration
Incoming integrations support custom JavaScript for transforming and validating data before it is posted to Rocket.Chat.
Script requirements
Scripts must be written in ES2015 (ECMAScript 6). Scripts run natively in a V8 environment, so contemporary JavaScript syntax is supported. Class method bodies always execute in strict mode per the ES2015 specification.
The script must define a global class named
Script.The
Scriptclass is instantiated once during the first execution and kept in memory.
How the script is executed
Rocket.Chat calls the process_incoming_request method every time a request is received by the webhook.
process_incoming_request(data)The method receives an object containing the incoming request.
It must return:
A valid Rocket.Chat message object, or
An object with an
errorproperty.
If an error object is returned, Rocket.Chat responds to the webhook request with a 400 HTTP status and a JSON error message.
Message requirements
A valid Rocket.Chat message must include at least a text field, which becomes the message body.
Redirecting messages
By default, messages are posted to the destination configured in Post to Channel. You can override this behavior in the script by specifying a channel field. Use a room ID, or prefix with # for a channel name or @ for a username.
For example:
#general@john
Following is a sample script to help you understand the structure:
/* exported Script */
/* globals console, _, s */

/** Global Helpers
 *
 * console - A normal console instance
 * _       - An underscore instance
 * s       - An underscore string instance
 */

class Script { // This is the global class instantiated only once during the first execution and then kept in memory.
  /**
   * @params {object} request
   */
  process_incoming_request({ request }) {
  /** This method takes an object as a parameter with the request property and returns an object with a content property
      containing a valid Rocket.Chat message, or an object with an error property, which is returned as the response to the request in JSON format
      with a Code 400 status. **/
    // request.url.hash
    // request.url.search
    // request.url.query
    // request.url.pathname
    // request.url.path
    // request.url_raw
    // request.url_params
    // request.headers
    // request.user._id
    // request.user.name
    // request.user.username
    // request.content_raw
    // request.content

    // console is a global helper to improve debug
    console.log(request.content);

    return {
      content:{ // The content property returns the valid response
        text: request.content.text
        // "attachments": [{
        //   "color": "#FF0000",
        //   "author_name": "Rocket.Cat",
        //   "author_link": "https://open.rocket.chat/direct/rocket.cat",
        //   "author_icon": "https://open.rocket.chat/avatar/rocket.cat.jpg",
        //   "title": "Rocket.Chat",
        //   "title_link": "https://rocket.chat",
        //   "text": "Rocket.Chat, the best open source chat",
        //   "fields": [{
        //     "title": "Priority",
        //     "value": "High",
        //     "short": false
        //   }],
        //   "image_url": "https://rocket.chat/images/mockup.png",
        //   "thumb_url": "https://rocket.chat/images/mockup.png"
        // }]
       }
    };

    // return { // The error response
    //   error: {
    //     success: false,
    //     message: 'Error example'
    //   }
    // };
  }
}
Handling separate responses
When an incoming integration sends messages to more than one room, either by specifying multiple destinations in the Post to Channel field or by defining multiple rooms in the script body, Rocket.Chat can return responses for each room individually.
By default, separateResponse is set to false. In this case, if the message fails to send to any one room, the entire request returns an error.
When separateResponse is set to true, Rocket.Chat returns an array of results, one for each room. Each result indicates whether the message was sent successfully or failed. This is useful when posting to multiple destinations, especially when some rooms may be inaccessible to the integration bot.
The following code snippet shows a sample response:
{
    "responses": [
        {
            "channel": "#publicChannel", // This is the public channel to which the message is sent
            "message": {
                "alias": "",
                "msg": "Example message",
                "attachments": [
                    {
                        "color": "#764FA5",
                        "text": "Rocket.Chat, the best open source chat",
                        "title": "Rocket.Chat",
                        "title_link": "https://rocket.chat"
                    }
                ],
                "parseUrls": false,
                "bot": {
                    "i": "68874863e327ad8138c3a3df"
                },
                "groupable": false,
                "emoji": ":ghost:",
                "ts": "2025-07-28T11:43:39.154Z",
                "u": {
                    "_id": "C38WSSzrGd2NCjzqJ",
                    "username": "test.cat",
                    "name": "Test Cat"
                },
                "rid": "67b451c857422a89b02e2ec9",
                "_id": "Dz8zc5H3aX8Bp6LtK",
                "_updatedAt": "2025-07-28T11:43:39.204Z",
                "mentions": [],
                "channels": [],
                "md": [
                    {
                        "type": "PARAGRAPH",
                        "value": [
                            {
                                "type": "PLAIN_TEXT",
                                "value": "Example message"
                            }
                        ]
                    }
                ]
            }
        },
        {
            "channel": "#privateChannel", // This is the private channel to which the message is not sent as the bot user does not have access to it
            "error": "error-not-allowed"
        }
    ],
    "success": true
}
Outgoing integration
Outgoing integrations send data from Rocket.Chat to external services when specific events occur. They can be triggered by messages, file uploads, room events, or user events.
Key capabilities
React to Rocket.Chat events (messages, file uploads, user actions)
Send data to external webhooks and APIs
Trigger word detection for bot commands
Automatic retry mechanism for failed requests
Create new outgoing integration
To create a new outgoing webhook:
In your workspace, go to Manage
 > Workspace > Integrations.
Click New in the top right corner.
Switch to the Outgoing tab.
Update the following settings:
Field
Description
Event Trigger
Select the type of event that triggers this outgoing webhook integration. The options are:
Message Sent
File Uploaded
Room Archived
Room Created (public and private)
User Joined Room
User Left Room
User Created
Enabled
Select this option to enable the webhook.
Name
Enter a name for your webhook.
Channel
Enter the channel to listen on. Enter the name with
@for a user or#for a channel. For example,@johnor#general. Enterall_public_channelsto listen on all public channels,all_private_groupsto listen on all private groups, andall_direct_messagesto listen to all direct messages.Trigger Words
If your event trigger is Message Sent, enter the words that should trigger this webhook, separated by commas.
URLs*
Enter the one or more URLs that recieves the event data when a trigger occurs. Separate multiple URLs with commas. You can modify this URL inside the script.
Impersonate User
Select this option to impersonate a user.
Post as*
Specify the username that the integration uses when posting messages. The user must already exist in the workspace.
For details on how to create users, see the Users document.
Alias
Enter a nickname that appears before the username in messages.
Avatar URL
Optionally enter an image URL as the avatar for each message the webhook posts.
Emoji
Optionally enter an emoji to use as an avatar.
Token*
Enter a token to verify authorized webhook calls. The token is optional but essential to avoid cross-site request forgery (CSRF) or replay attacks.
Script Enabled
Select this option to enable the script. You can use scripts to process all messages from a channel and modify how Rocket.Chat creates or cancels the request. You can either cancel the request and return a message or take no action. Additionally, you can create another request within the script using the HTTP global helper. When a response is received from the request, it executes the script, calling another method that allows you to process the response, similar to incoming webhooks.
Script
Enter the script used to process requests and responses. For details, see Script for outgoing integrations. Class method bodies execute in strict mode. Refer to Script compatibility for supported syntax.
Responding
If the handler wishes to post a response back into the channel, a JSON response should be returned as the body. Empty bodies or bodies with an empty text property will simply be ignored. Non-200 responses will be retried a reasonable number of times. A response will be posted using the alias and avatar specified in this JSON code. It overrides the Alias and Avatar URL settings.
Advanced settings
Retry Failed Url Calls
Select whether the integration should retry a reasonable amount of time if the call out to the URL fails.
Retry Count
Set the number of times the integration should be retried if the call to the URL fails.
Retry Delay
Select the delay algorithm to be used to call the URLs again. The options are:
powers of ten (10 ^ x)
powers of two (2 ^ x)
increments of two (x * 2)
Word Placement Anywhere
Select whether the trigger words can be placed anywhere in the sentence other than the beginning.
Run On Edits
Select whether the integration runs when the message is edited. Setting this to false will cause the integration to only run on new messages.
Click Save.
Test an outgoing integration
After saving the integration, trigger the event you configured and verify that Rocket.Chat sends a request to the configured URL.
For example, if the Event Trigger is Message Sent and you configured one or more Trigger Words, send a message containing one of those trigger words in the selected channel. Rocket.Chat sends a POST request to the configured URL with information about the message and the user who sent it.
To confirm that the integration is working, verify that your webhook endpoint receives the request and review the request payload received by your service.
Script for outgoing integrations
Overview
Outgoing integrations allow Rocket.Chat to send messages and events to external services using HTTP requests.
Each integration is implemented as a JavaScript script written in ES2015 (ECMAScript 6). Scripts run natively in a V8 environment, so contemporary JavaScript syntax is supported. Class method bodies always execute in strict mode per the ES2015 specification.
The script must define a global class named
Script.Rocket.Chat instantiates this class once during the first execution and reuses the same instance for all subsequent events.
The Script class can implement two methods:
prepare_outgoing_requestprocess_outgoing_response
These methods control how requests are sent to external services and how responses are handled.
Event triggers
The prepare_outgoing_request method is executed when one of the following events occurs in the configured channel.
Message Sent: Triggered when a message starts with one of the configured Trigger Words.
File Uploaded: Triggered when a file is uploaded in the channel.
Room Archived: Triggered when the channel is archived.
Room Created: Triggered when a new channel is created.
User Joined Room: Triggered when a user joins the channel.
Request handling
The prepare_outgoing_request method must return an object containing at least the url and method properties. You can also modify or replace the request object before returning it. It is also possible to:
return nothing to cancel the request
return a message instead of sending a request
Response handling
The Script class may also include another method called process_outgoing_response. This method is called for every response received from the request.
Response parameters
The method receives an object containing two properties:
request: the object returned byprepare_outgoing_requestresponse: the HTTP response from the request
Return values
The process_outgoing_response method can return:
nothing, to continue with the default processing
false, to stop the processan object with a
contentproperty containing a valid Rocket.Chat message
Example
The following example script sends commands such as issues, comments, and pull requests to GitHub:
/* exported Script */
/* globals console, _, s, HTTP */

/** Global Helpers
 *
 * console - A standard console instance
 * _       - An underscore instance
 * s       - An underscore string instance
 * HTTP    - The Meteor HTTP object to do sync http calls
 */

class Script {
  /**
   * @params {object} request
   */
  prepare_outgoing_request({ request }) {
    // request.params            {object}
    // request.method            {string}
    // request.url               {string}
    // request.auth              {string}
    // request.headers           {object}
    // request.data.token        {string}
    // request.data.channel_id   {string}
    // request.data.channel_name {string}
    // request.data.timestamp    {date}
    // request.data.user_id      {string}
    // request.data.user_name    {string}
    // request.data.text         {string}
    // request.data.trigger_word {string}

    let match;

    // Change the URL and method of the request
    match = request.data.text.match(/^pr\s(ls|list)/);
    if (match) {
      return {
        url: request.url + '/pulls',
        headers: request.headers,
        method: 'GET'
      };
    }

    // Prevent the request and return a new message
    match = request.data.text.match(/^help$/);
    if (match) {
      return {
        message: {
          text: [
            '**commands**',
            '```',
              '  pr ls [open|closed|all]  List Pull Requests',
            '```'
          ].join('\n')
          // "channel": "#name-of-channel",
          // "attachments": [{
          //   "color": "#FF0000",
          //   "author_name": "Rocket.Cat",
          //   "author_link": "https://open.rocket.chat/direct/rocket.cat",
          //   "author_icon": "https://open.rocket.chat/avatar/rocket.cat.jpg",
          //   "title": "Rocket.Chat",
          //   "title_link": "https://rocket.chat",
          //   "text": "Rocket.Chat, the best open source chat",
          //   "fields": [{
          //     "title": "Priority",
          //     "value": "High",
          //     "short": false
          //   }],
          //   "image_url": "https://rocket.chat/images/mockup.png",
          //   "thumb_url": "https://rocket.chat/images/mockup.png"
          // }]
        }
      };
    }
  }

  /**
   * @params {object} request, response
   */
  process_outgoing_response({ request, response }) {
    // request              {object} - the object returned by prepare_outgoing_request

    // response.error       {object}
    // response.status_code {integer}
    // response.content     {object}
    // response.content_raw {string/object}
    // response.headers     {object}

    var text = [];
    response.content.forEach(function(pr) {
      text.push('> '+pr.state+' [#'+pr.number+']('+pr.html_url+') - '+pr.title);
    });

    // Return false will abort the response
    // return false;

    // Return empty will proceed with the default response process
    // return;

    return {
      content: {
        text: text.join('\n'),
        parseUrls: false
        // "attachments": [{
        //   "color": "#FF0000",
        //   "author_name": "Rocket.Cat",
        //   "author_link": "https://open.rocket.chat/direct/rocket.cat",
        //   "author_icon": "https://open.rocket.chat/avatar/rocket.cat.jpg",
        //   "title": "Rocket.Chat",
        //   "title_link": "https://rocket.chat",
        //   "text": "Rocket.Chat, the best open source chat",
        //   "fields": [{
        //     "title": "Priority",
        //     "value": "High",
        //     "short": false
        //   }],
        //   "image_url": "https://rocket.chat/images/mockup.png",
        //   "thumb_url": "https://rocket.chat/images/mockup.png"
        // }]
      }
    };
  }
}
Integration pattern
Pattern for Incoming Webhooks
Incoming webhooks allow another platform to notify Rocket.Chat through webhook requests. The process typically follows these steps:
Create an incoming webhook in Rocket.Chat.
Understand the data structure sent by the source platform. Most platforms send data in JSON format, so you need to know the structure of the data that will be sent to your webhook.
Construct a Rocket.Chat message using the data returned by the third-party platform. The message payload should follow the Rocket.Chat message structure.
Pattern for Outgoing Webhooks
Outgoing webhooks notify a third-party platform about events occurring in your Rocket.Chat workspace. The typical process is as follows:
Generate a webhook URL on the third-party platform (for example, Slack).
Create an outgoing webhook in Rocket.Chat and replace the URLs field with the generated webhook URL.
Understand the data format expected by the third-party platform so you can map Rocket.Chat message data to that structure.
Construct the payload in the format required by the third-party platform.
All data manipulation is handled within the webhook's Script class.
Script compatibility
This section covers the categories of script patterns that can break and the correct alternatives you must use.
Previously, Rocket.Chat used Babel transpilation which converted class to E5 prototypes (not strict). From Rocket.Chat version 8.4.0, class method bodies are always in strict mode per ES2015. From 9.0.0, Babel will no longer be used for webhook integration script compilation. This is a breaking change for scripts that rely on sloppy-mode behavior. If your scripts are in strict mode, you don’t need to take any action. Otherwise, admins may need to review the existing integrations. Any script using class Script { ... } that contains the following patterns must be updated.
Implicit global (high risk)
Variables declared without let, const, or var inside a class method throw a ReferenceError at runtime.
// fails
class Script {
    process_incoming_request({ request }) {
      msg = buildMessage(request.content);  // ReferenceError in strict
      return { content: { text: msg.text } };
    }
  }
// correct
class Script {
    process_incoming_request({ request }) {
      const msg = buildMessage(request.content);
      return { content: { text: msg.text } };
    }
  }
this in nested regular functions (high risk)
Inside a class method, a nested function declaration has this === undefined in strict mode. Code that relied on this resolving to globalThis (for accessing globals like JSON) throw a TypeError.
// fails
class Script {
    process_incoming_request({ request }) {
      function helper() {
        return this.JSON.stringify(request);  // this === undefined in strict, TypeError: Cannot read properties of undefined
      }
      return { content: { text: helper() } };
    }
  }
// correct
class Script {
    process_incoming_request({ request }) {
      const helper = () => {
        return JSON.stringify(request);  // use an arrow function, this inherits the outer scope
      };
      return { content: { text: helper() } };
    }
  }
arguments.callee (medium risk)
Referencing arguments.callee inside a class method throws a TypeError in strict mode. Use a named function expression instead.
// fails
class Script {
    process_incoming_request({ request }) {
      const factorial = function(n) {
        return n <= 1 ? 1 : n * arguments.callee(n - 1);  // TypeError
      };
    }
  }
// correct
class Script {
    process_incoming_request({ request }) {
      const factorial = function f(n) {
        return n <= 1 ? 1 : n * f(n - 1);  // named expression
      };
    }
  }
Octal literals (low risk)
// fails
const perms = 0777;   // SyntaxError in strict
//correct
const perms = 0o777;  // ES2015 octal
Duplicate parameter names (low risk)
// fails
function merge(a, a) { ... }  // SyntaxError in strict
// correct
function merge(a, b) { ... }
Test the script compatibility
From 8.4, Rocket.Chat supports the optional skipTranspile body parameter in the Create Integration and Update Integration endpoints. You can add this parameter to each integration to test the script. When skipTranspile is set to true, the script is stored as-is without Babel processing, matching the 9.0.0 default. This helps you verify that the script works and fix any issues that come up well before the 9.0.0 release.