Once you log in to your workspace as an agent and set your status to Available, you can manage incoming and existing Omnichannel conversations.
Handling new Omnichannel messages
When a new message from a contact is received in the workspace, it is processed according to the routing algorithm in use:
Auto-assignment: The message is directly assigned to an agent and appears in the Chats in Progress section.
Queued chat: The message is placed in the Queued Chat section, where it awaits an available agent to claim it.
Managing auto-assigned chats
If a chat is automatically assigned to you:
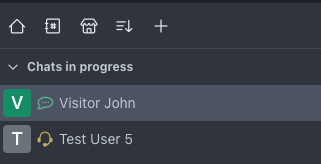
The conversation appears under Chats in Progress in the sidebar.
Click on the conversation to start replying to the contact.
Chats in progress
Handling queued chats
If a chat is in the queue due to the routing algorithm:
The conversation appears under the Queued Chat section.
The chat is available for any agent to take.
Click on the conversation to view its details.
When ready, click Take it to move the conversation from the queue to Chats in Progress.
Send a reply to the contact to begin the interaction.
.png)
If a message is sent to a department you don't belong to, you won't receive it in queue.
When the contacts are typing messages, the typing indicator is displayed next to their icon. For example,

Quick actions for Omnichannel conversations
As an agent, you can manage omnichannel conversations using the quick actions on the menu bar. These actions are represented by icons at the top of the chat screen.
Move chat back to the queue
If an omnichannel conversation in progress needs to be made available for other agents to handle:
Click Move to the queue
 from the menu bar.
The conversation is moved back to Queued Chats for other agents to view and take it.
This option is only available when the routing algorithm is set to manual selection.
Transfer a chat to an agent or department
If a conversation needs to be handled by another department or agent:
Click on the Forward
 icon from the menu bar.
Enter the department or the agent to whom the conversation should be forwarded.
Leave a comment if necessary and click Forward.
A notification will briefly appear at the top to indicate whether the operation was successful or failed. If successful, the selected agent or available agent in the chosen department will receive the chat and can continue the conversation with the contact.
It requires the
Transfer Livechat Guestspermission.You cannot forward conversations to offline agents or disabled departments.
When forwading the chat to another department, you can also specify a default agent in that department to receive the chat using the Forward Omnichannel Room API .
Send chat transcript
You can email the chat transcript to a contact or export it as a PDF. Sending chat transcripts via email is only available for contacts with a registered email address.
To send the transcript via email:
Click the Send transcript
 icon from the menu bar
Select Send via email. The contact email address is already prefilled.
Enter a subject for the email.
Click Request.
The transcript is sent to the contact via email. Sending transcripts via email requires the Send Omnichannel Conversation Transcript permission.
To export the transcript as a PDF:
Click the Send transcript
icon from the menu barSelect Export chat transcript as PDF.
You will receive a new direct message from rocket.cat with the transcript attached in PDF format. Exporting PDF transcripts requires the Request PDF Transcript permission.
Exporting the chat transcript as a PDF is only available after closing the Omnichannel conversation. You cannot export PDF transcripts from ongoing conversations.
To automatically export conversation transcripts:
Click your avatar and select My Account.
Navigate to Omnichannel and enable the transcript options you want to automate:
Export chat transcript as PDF: Automatically export the transcript as a PDF at the end of conversations.
Send chat transcript via email: Automatically send the transcript to contacts via email at the end of conversations.
Click Save Changes.
Place conversation on-hold .svg)
As an agent, there are times when Omnichannel contacts may leave the conversation unexpectedly. The conversation remains in your queue until it is closed, which can affect your ability to handle new chats if you’re at your conversation limit. The "Place Chat On-Hold" feature allows you to temporarily pause such conversations.
To place a conversation on hold:
Click the Place Chat On-Hold icon
 from the menu bar.
Click Place Chat On-Hold to confirm the action.
The chat will be moved under On hold section. If the contact engages again, the routing algorithm will first attempt to assign the conversation to you. If you are at maximum capacity, it will be routed to the next available agent. You can also manually resume the conversation by clicking the Resume button from the chat room.
To enable this feature, the workspace administrator must activate Allow agents to manually place chat On Hold under Manage ![]() > Settings > Omnichannel > Sessions.
> Settings > Omnichannel > Sessions.
By default, you can only place a conversation on hold if you sent the last message to the contact. Admins can disable this under Manage
> Settings > Omnichannel > Sessions > Chats on hold only after agent engagement.
End conversation
To end a conversation:
Click the End conversation
.png "image(4).png") icon from the menu bar
icon from the menu barAdd a comment to close the conversation
Update tags for the conversation if needed.
Select Export chat transcript as PDF to get a PDF transcript for the conversation.
Click Confirm. The conversation will be removed from the Chats in Progress queue.
If you choose to export the chat transcript, you will receive the PDF as a direct message from rocket.cat. Once a conversation is closed, no agent can join the room.
Use canned responses .svg)
Canned responses allow you to communicate quickly by using pre-saved message snippets. You can use these in both Omnichannel conversations and regular chats within your Rocket.Chat workspace.
To send a canned response:
Start your message with
!followed by the canned response shortcut. Alternatively, after typing!, you can select the desired response from the drop-down list that appears above your text field.
To access available canned responses in your workspace:
Click the Canned Responses icon
.png "image(7).png") from the menu bar.
from the menu bar.Click Create to add a new canned response.
From the list, select the canned response you want to use.
Click Use to insert the response into your chat.
Click Edit to update the response, if you have the appropriate permissions.
To learn more about how to create and manage canned responses, visit the Canned Responses documentation.
View and edit room information
To view the details of your current conversation:
Click the Room Information icon from the menu bar.
The following details are displayed on the right side of the conversation:
Channel: The platform used for the conversation (e.g., Livechat, WhatsApp Cloud API, Instagram).
Contact: The name or identifier of the contact being served.
Agent: The name of the agent serving the contact.
Queue Time: The duration the conversation spent in the queue before being taken by an agent.
Created at: The date and time the conversation was initiated.
Taken at: The date and time the conversation was assigned to an agent.
Average Response Time: The average time taken by the agent to respond during the chat.
Inactivity Time: The duration the conversation was inactive while waiting for the contact to reply to the last message from the agent.
Custom fields: Any visible room-scope custom fields associated with the conversation.
Click Edit to add details such as the topic, custom fields, tags, or priority of the conversation. Then, click Save to confirm your changes.
Access contact information
To view the details of the contact in the conversation:
Click the Contact Information
.png "image(8).png") icon from the menu bar. The following details will be displayed:
icon from the menu bar. The following details will be displayed:Name or username of the contact
Email address or phone number of the contact
Date the conversation was created
Date of the last message sent in the chat
Contact manager details
Any visible visitor-scope custom fields associated with the contact.
Click Chat History to view the history of previous conversations with the contact.
Click Edit to update contact details.
You can update the name, email, and phone number, custom fields, and assign a contact manager.
Then, click Save Changes.
If the assigned contact manager is online when the contact starts a chat, the routing system will assign the chat to the contact manager instead of a random agent.
Search chats
To search for messages in a conversation:
Click the Search
.png "image(9).png") icon from the menu bar.
icon from the menu bar.Enter your search query.
The search results will be displayed as you type.
You can also use Regular Expressions.
Search for file attachments
To search for files that have been attached to a conversation:
Click the Files
.png "image(10).png") icon from the menu bar.
icon from the menu bar.All attached files will be displayed.
Enter your search query.
Optionally, filter by file type: Images, Video, Audio, Text, or Files. By default, all file types are displayed.
View contact chat history
To access the chat history of a contact:
Click the Contact Information
icon from the menu bar. Switch to the History tab.
All previous conversations with the contact in the workspace will be displayed.
Click each conversation to see it’s chat history.
You can search for messages in the selected chat history or open the chat.
Invite users to a chat
Invite other agents or managers to an ongoing chat when you need additional help or collaboration with a contact.
To invite:
In the chat, send the slash command
/invite @<username>.
This process triggers the Join Livechat Room API in the backend to invite users to the live chat room.
Invitations can only be sent by users with the
Add User to Any Joined Channelpermission, and recipients must have theView Omnichannel Roomspermission.
Start a call
Conference calls in Rocket.Chat are also functional in Omnichannel rooms with any of the available apps like Jitsi, Pexip, BigBlueButton, and Google Meet. Workspace admins must set the default call provider in Omnichannel call settings before you can start any calls. Visit the Conference Call User's Guide to learn how to start calls in rooms.