This guide shows you how to deploy Rocket.Chat on Kubernetes with Helm. The official Rocket.Chat Helm chart creates a workspace designed for scalability, resilience, and high availability.
The deployment separates Rocket.Chat from its database. You can manage your database layer independently of the application layer. It follows this approach:
Provision an external MongoDB database. This guide covers deploying a database using the MongoDB Kubernetes operator. If you already have an external MongoDB instance or use a managed service like Atlas, you can skip this phase and move directly to configuring the monitoring stack.
After your external MongoDB is ready, configure the monitoring stack.This enables observability in your workspace and ensures you can monitor your deployment effectively.
Once the database and monitoring stack are healthy, proceed to deploy Rocket.Chat and connect it to your external MongoDB instance.
If you currently use the bundled setup with the internal MongoDB chart, refer to Moving from Bitnami to Official MongoDB Chart forum for migration guidance.
In this guide, you'll learn how to:
Prerequisites
This guide assumes you have a basic understanding of Kubernetes and Helm. Before you begin, verify you have the following server requirements and Kubernetes resources.
Server requirements
Your domain name must point to your server’s external IP address.
You need a live Kubernetes cluster with kubectl v1.21 or higher configured.
Helm version 3 must be installed on your server.
Check that your firewall allows HTTPS traffic.
Kubernetes resource requirements
Make sure the following Kubernetes resources are ready in your cluster before moving on with deployment.
The examples that follow are intended as a guide. Adjust your implementation as needed based on your environment and Kubernetes setup before advancing to subsequent steps.
Storage Class: A StorageClass is required to provision Persistent Volumes (PVs). If your cluster doesn't have one, you'll need to create it. Run this command to check your storage class:
kubectl get storageclassCopy the name of your StorageClass, you’ll need it to configure the database in subsequent steps.
The Rocket.Chat Helm chart requires your Kubernetes cluster to support dynamic persistent volume (PV) provisioning. Local Kubernetes distributions such as Kind, K3s, and Minikube often ship without a storage provisioner enabled. In such cases, you can either connect to an external MongoDB instance or install a compatible local storage provisioner.
Ingress Controller: An Ingress Controller is essential for routing external traffic to your Rocket.Chat services. This guide uses Traefik as an example.
Add the official Traefik Helm repository:
helm repo add traefik https://traefik.github.io/charts
helm repo update
Install Traefik:
helm install traefik traefik/traefik \
  --namespace traefik \
  --create-namespace
Confirm that the service has an external IP address by running:
kubectl get svc -n traefik
TLS certificate manager: If you don't have a valid TLS certificate, install
cert-managerto automate certificate management via Let's Encrypt.Install cert-manager by running:
kubectl apply -f https://github.com/cert-manager/cert-manager/releases/download/v1.14.3/cert-manager.yamlConfirm the resources are created:
kubectl get all -n cert-manager
ClusterIssuer: cert-manager requires a ClusterIssuer to automatically issue TLS certificates across the cluster. In this guide, we’ll use Let’s Encrypt.
Create a
clusterissuer.yamlfile and save the following content:apiVersion: cert-manager.io/v1 kind: ClusterIssuer metadata: labels: app.kubernetes.io/instance: use1-cert-manager name: production-cert-issuer # Set your preferred name spec: acme: server: https://acme-v02.api.letsencrypt.org/directory email: user01@mycompany.com # Replace with your email privateKeySecretRef: name: cert-manager-secret-production # Set your preferred name solvers: - http01: ingress: class: traefikReplace
user01@mycompany.comwith your email address and setprivateKeySecretRef.nameto your prefered name.Create the resource:
kubectl apply -f clusterissuer.yamlVerify the ClusterIssuer was deployed and the secret was created succesfully:
kubectl get clusterissuer
kubectl get secret -n cert-manager
Step 1: Add the Helm chart repositories
Add the official Rocket.Chat and MongoDB Helm repositories:
helm repo add mongodb https://mongodb.github.io/helm-charts
helm repo add rocketchat https://rocketchat.github.io/helm-charts
helm repo update
A confirmation that repositories were added is returned.
Step 2: Install MongoDB Kubernetes operator
With the required kubernetes resources in place, the next step is to install the MongoDB Kubernetes operator to manage MongoDB lifecycle tasks like provisioning, scaling, and health checks.
Create a namespace:
kubectl create namespace rocketchatThis guide uses "rocketchat" as the namespace. You can change the namespace, but ensure you use the chosen name in subsequent steps.
Install the MongoDB operator:
helm install mongodb-kubernetes-operator mongodb/mongodb-kubernetes \
  -n rocketchat
Do not install CRDs separately. The operator chart manages them automatically.
Wait for the MongoDB operator to be ready:
kubectl rollout status deployment/mongodb-kubernetes-operator \
  -n rocketchat \
  --timeout=300s
Step 3: Configure database secrets and replica set
Once the MongoDB operator is running, define the MongoDB resources to provision a replica set and configure authentication for Rocket.Chat.
Create
mongodb-secrets.yamlwith the following MongoDB secrets for database administrators, application user, and the monitoring endpoints:--- apiVersion: v1 kind: Secret metadata: namespace: rocketchat name: mongodb-admin-password type: Opaque stringData: password: <your-secure-admin-password> --- apiVersion: v1 kind: Secret metadata: namespace: rocketchat name: mongodb-rocketchat-password type: Opaque stringData: password: <your-secure-rocketchat-password> --- apiVersion: v1 kind: Secret metadata: namespace: rocketchat name: metrics-endpoint-password type: Opaque stringData: password: <your-secure-prometheus-password> --- apiVersion: v1 kind: Secret metadata: namespace: rocketchat name: admin-scram-credentials type: Opaque stringData: username: admin password: <your-secure-admin-password> --- apiVersion: v1 kind: Secret metadata: namespace: rocketchat name: rocketchat-scram-credentials type: Opaque stringData: username: rocketchat password: <your-secure-rocketchat-password>Replace these placeholder passwords with secure values:
<your-secure-admin-password>,<your-secure-rocketchat-password>,<your-secure-prometheus-password>.Apply the secrets:
kubectl apply -f mongodb-secrets.yamlCreate
mongodb-community.yamlfile. Choose between a single node or multiple node ReplicaSet for MongoDB as needed:
apiVersion: mongodbcommunity.mongodb.com/v1
kind: MongoDBCommunity
metadata:
  name: mongodb
  namespace: rocketchat
spec:
  members:  1
  type: ReplicaSet
  version: "8.0.0"
  security:
    authentication:
      modes:  ["SCRAM"]
    tls:
      enabled: false
  users:
  - name:  admin
    db:  admin
    passwordSecretRef:
      name: mongodb-admin-password
    scramCredentialsSecretName: admin-scram-credentials
    roles:
    - name: root
      db: admin
  - name: rocketchat
    db: rocketchat
    passwordSecretRef:
      name:  mongodb-rocketchat-password
    scramCredentialsSecretName: rocketchat-scram-credentials
    roles:
    - name: readWrite
      db: rocketchat
  prometheus:
    username:  prometheus-username
    passwordSecretRef:
      name: metrics-endpoint-password
  statefulSet:
    spec:
      volumeClaimTemplates:
      - metadata:
          name: data-volume
        spec:
          accessModes: ["ReadWriteOnce"]
          storageClassName:  <your-storage-class>
          resources:
            requests:
              storage: 50Gi
      template:
        spec:
          containers:
          - name: mongod
            resources:
              limits:
                cpu:  1500m
                memory:  1Gi       #Configure the limits memory as required
              requests:
                cpu: 500m
                memory: 1Gi        #Configure the requests memory as required
Replace
<your-storage-class>with your actual StorageClass name.
apiVersion: mongodbcommunity.mongodb.com/v1
kind: MongoDBCommunity
metadata:
  name: mongodb
  namespace: rocketchat
spec:
  members:  3    #Set your desired number of replicaSet
  type: ReplicaSet
  version: "8.0.0"
  security:
    authentication:
      modes:  ["SCRAM"]
    tls:
      enabled: false
  users:
  - name:  admin
    db:  admin
    passwordSecretRef:
      name: mongodb-admin-password
    scramCredentialsSecretName: admin-scram-credentials
    roles:
    - name: root
      db: admin
  - name: rocketchat
    db: rocketchat
    passwordSecretRef:
      name:  mongodb-rocketchat-password
    scramCredentialsSecretName: rocketchat-scram-credentials
    roles:
    - name: readWrite
      db: rocketchat
  prometheus:
    username:  prometheus-username
    passwordSecretRef:
      name: metrics-endpoint-password
  statefulSet:
    spec:
      volumeClaimTemplates:
      - metadata:
          name: data-volume
        spec:
          accessModes: ["ReadWriteOnce"]
          storageClassName:  <your-storage-class>
          resources:
            requests:
              storage: 50Gi
      template:
        spec:
          containers:
          - name: mongod
            resources:
              limits:
                cpu:  1500m
                memory:  6Gi       #Configure the limits memory as required
              requests:
                cpu: 500m
                memory: 3Gi        #Configure the requests memory as required
Replace
<your-storage-class>with your actual StorageClass name.Update the value of
spec.membersto the desired number of replica set members. Replace the existing number as needed.Update the value of
limits.memoryandrequests.memoryas required for your workspace.
Apply the MongoDB resource :
kubectl apply -f mongodb-community.yaml
Step 4: Verify the MongoDB deployment
Once MongoDB is deployed, it is essential to validate its health and connectivity to ensure the database is ready to handle application traffic.
Wait for the MongoDB pods to become ready:
kubectl wait --for=condition=ready pod -l app=mongodb-svc \
  -n rocketchat \
  --timeout=300s
Confirm the pod status:
kubectl get pods -n rocketchat | grep mongodbVerify the MongoDB service endpoints:
kubectl get endpoints mongodb-svc -n rocketchat
You should see the MongoDB pod’s IP address listed. If no endpoints appear, the service selector may not match the pod labels correctly. Consult the Kubernetes Deployment FAQ for troubleshooting guidance.
Validate MongoDB health
Choose the setup that matches how you created mongodb-community.yaml earlier to deploy MongoDB:
Run a ping against the admin database to confirm MongoDB is responding:
kubectl exec -it mongodb-0 -n rocketchat -- \
  mongosh admin --eval "db.adminCommand('ping')"
Expected output: { ok: 1 }. If you see an error, do not proceed until MongoDB is healthy.
Verify that the primary database is healthy:
kubectl exec -it mongodb-0 -n rocketchat -- \
  mongosh admin --eval "db.adminCommand('ping')"
Expected output:
{ ok: 1 }. If you see an error, do not proceed until MongoDB is healthy.Check the status of all replica set members to confirm they are in sync:
kubectl exec -it mongodb-0 -n rocketchat -- mongosh admin \
  -u admin \
  -p $(kubectl get secret mongodb-admin-password -n rocketchat -o jsonpath='{.data.password}' | base64 -d) \
  --eval "rs.status()"
Build the MongoDB connection string
Rocket.Chat requires a specific URI format to connect to the database.
Extract the rocketchat user password and generate the MongoDB connection string:
MONGO_PASSWORD=$(kubectl get secret mongodb-rocketchat-password \
  -n rocketchat -o jsonpath='{.data.password}' | base64 -d)
echo "MongoDB URI:"
echo "mongodb://rocketchat:${MONGO_PASSWORD}@mongodb-0.mongodb-svc.rocketchat.svc.cluster.local:27017/rocketchat?authSource=rocketchat&replicaSet=mongodb"
The generated connection string will be in the following format:
mongodb://rocketchat:testrc123@mongodb-0.mongodb-svc.rocketchat.svc.cluster.local:27017/rocketchat?authSource=rocketchat&replicaSet=mongodbSave the generated MongoDB connection string, you’ll need it later to connect to Rocket.Chat to your database.
If you deployed a multi-node ReplicaSet for MongoDB, update the connection string to include all replica set members as comma-separated hosts before the database path. The number of hosts should match the number of members you configured in
spec.members.
Step 5: Deploy the monitoring stack
To enable comprehensive monitoring for your workspace, the official Rocket.Chat Helm chart integrates Prometheus for collecting metrics, Loki for log aggregation, and Grafana for visualizing metrics and logs with interactive dashboards. This monitoring stack helps you visualize key metrics, monitor performance, and gain actionable insights into the health of your Rocket.Chat deployment.
Create a file named
values-monitoring.yamland add the following configuration:ingress: enabled: true ingressClassName: "traefik" # Specify the installed ingress controller in the K8s cluster tls: true grafana: enabled: true host: "domain.xyz" path: "/grafana"Replace
domain.xyzwith your actual domain name.Set
ingressClassNameto match the ingress controller deployed in your Kubernetes cluster.
Install the monitoring stack:
helm install monitoring -f values-monitoring.yaml rocketchat/monitoring -n rocketchatA successful output looks similar to this:

Step 6: Configure Rocket.Chat
With database and monitoring stack running, the next step is to define how Rocket.Chat should run in your cluster. These configuration values control image versions, ingress, TLS, and service behavior.
Create a
values.yamlfile to define your deployment configurations. This file specifies how Helm should configure your Rocket.Chat workspace.Below is an example configuration to use for your
values.yamlfile:image: pullPolicy: IfNotPresent repository: registry.rocket.chat/rocketchat/rocket.chat tag: <release> # Set the Rocket.Chat release mongodb: enabled: false externalMongodbUrl: "<enter-external-mongodb-uri>" microservices: enabled: true replicaCount: 1 host: <domain.xyz> ingress: enabled: true ingressClassName: traefik annotations: cert-manager.io/cluster-issuer: production-cert-issuer tls: - secretName: rckube hosts: - <domain.xyz> nats: cluster: name: rocketchat-nats-clusterReplace
<release>with the Rocket.Chat version you want to deploy.Connect the external MongoDB by replacing
<enter-external-mongodb-uri>with the connection string you saved in step 4.Update
<domain.xyz>with your actual domain name.Set the
ingressClassNameto the ingress controller you are using.If you’ve configured a certificate manager and ClusterIssuer for TLS, specify your ClusterIssuer name and a
secretNamefor TLS. If you already have a valid certificate or do not wish to use TLS, theannotationsandtlsvalues can be omitted.Explore additional deployment configuration options you can set in your
values.yamlfile to suit your workspace requirements.
While microservices is enabled in this configuration, it uses a single replica which is suitable for Community workspaces. To scale your workspace with multiple replicas, see our Microservices documentation.
Step 7: Deploy Rocket.Chat
After finalizing the configuration, launch the Rocket.Chat deployment.
Install Rocket.Chat with the configurations you defined in
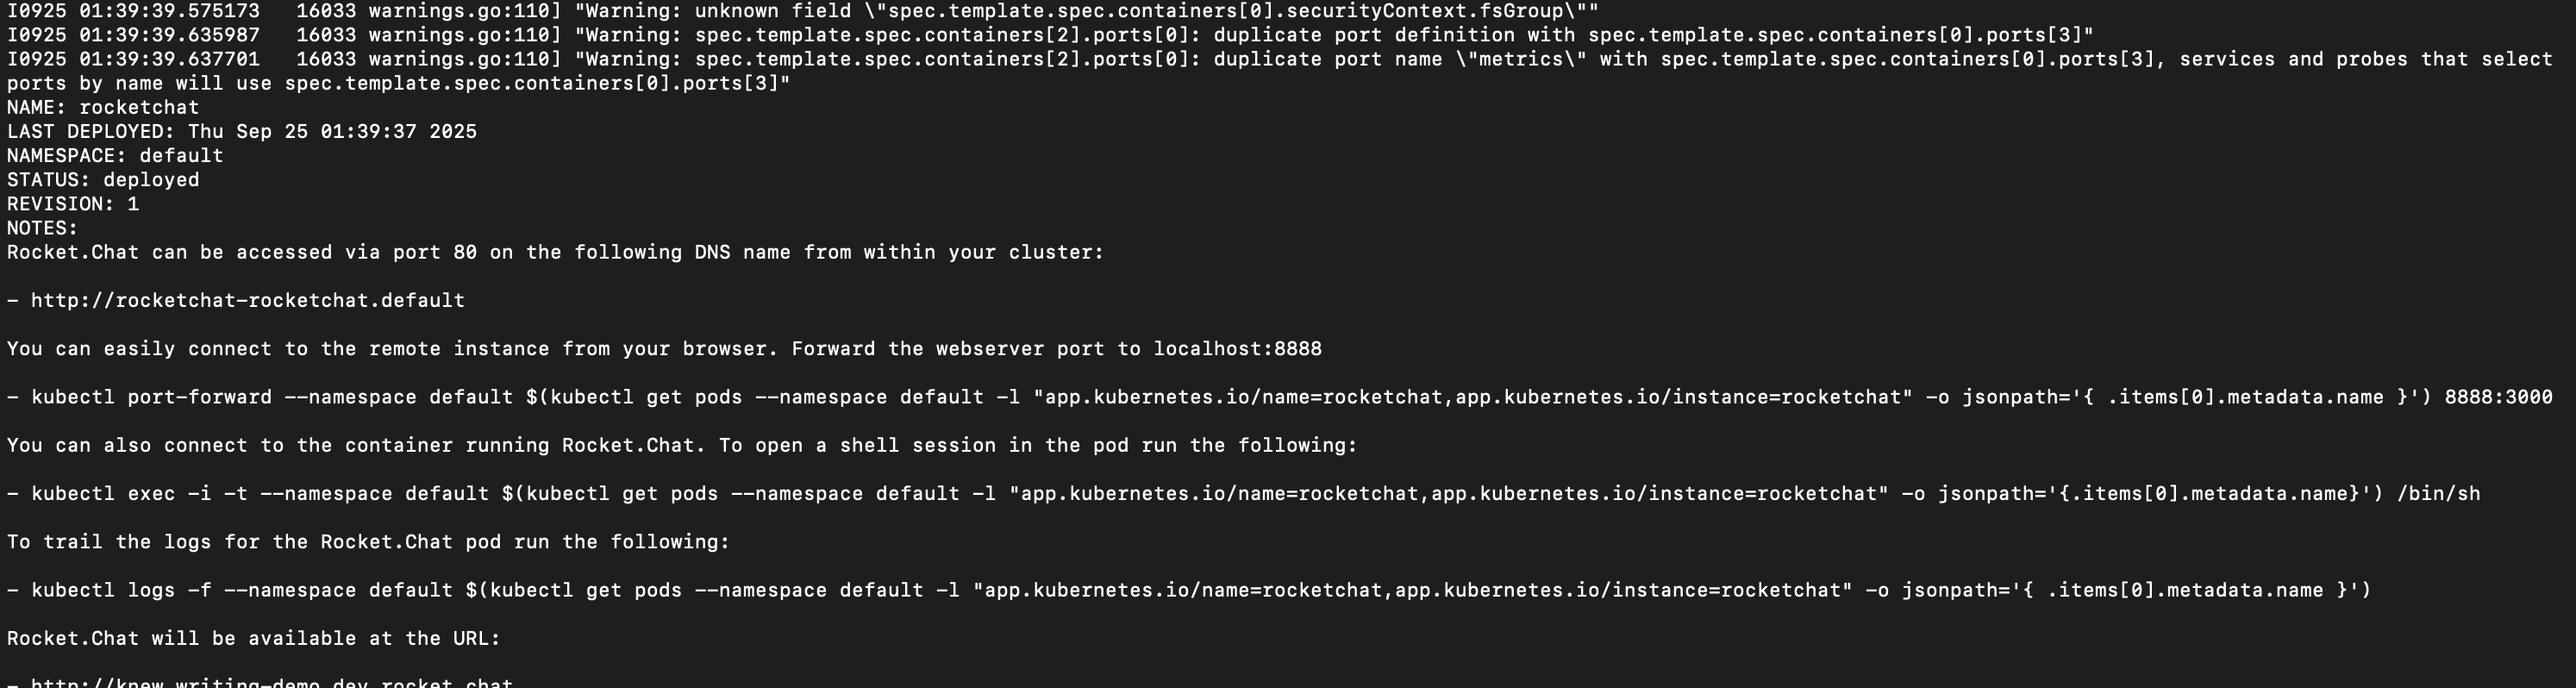
values.yaml:helm install rocketchat -f values.yaml rocketchat/rocketchat -n rocketchatIf your deployment is successful, you’ll get a response similar to the following:
Wait for the Rocket.Chat to be ready:
kubectl rollout status deployment/rocketchat-rocketchat \
  -n rocketchat \
  --timeout=300s
Verify that the pods for your deployment are running:
kubectl get pods -n rocketchatYou should see a list of pods in the
Runningstate, similar to the example below: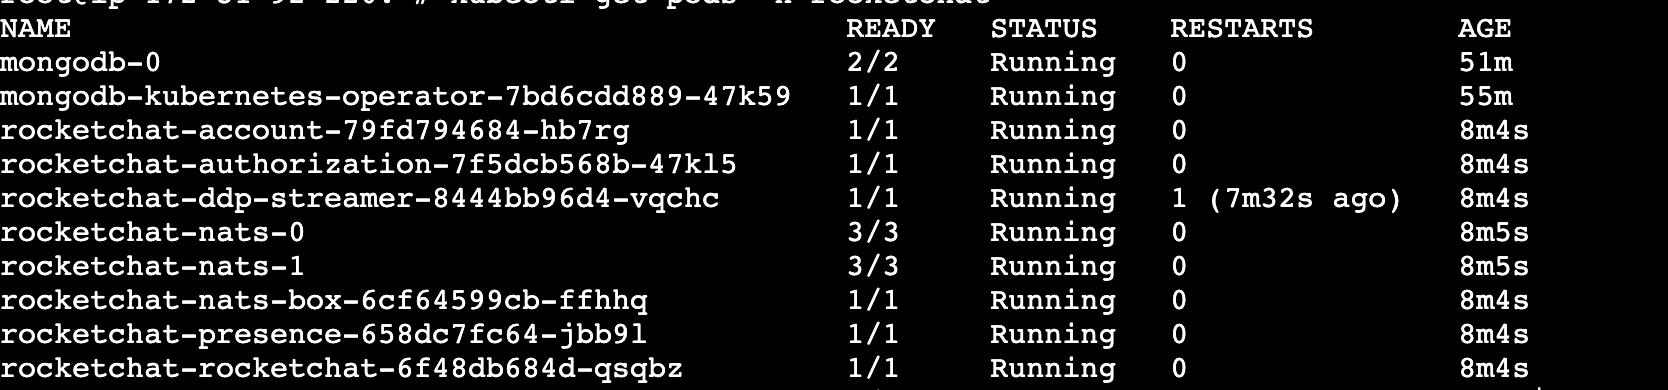
Your output may vary depending on your configuration.
Check Rocket.Chat logs to confirm it's started:
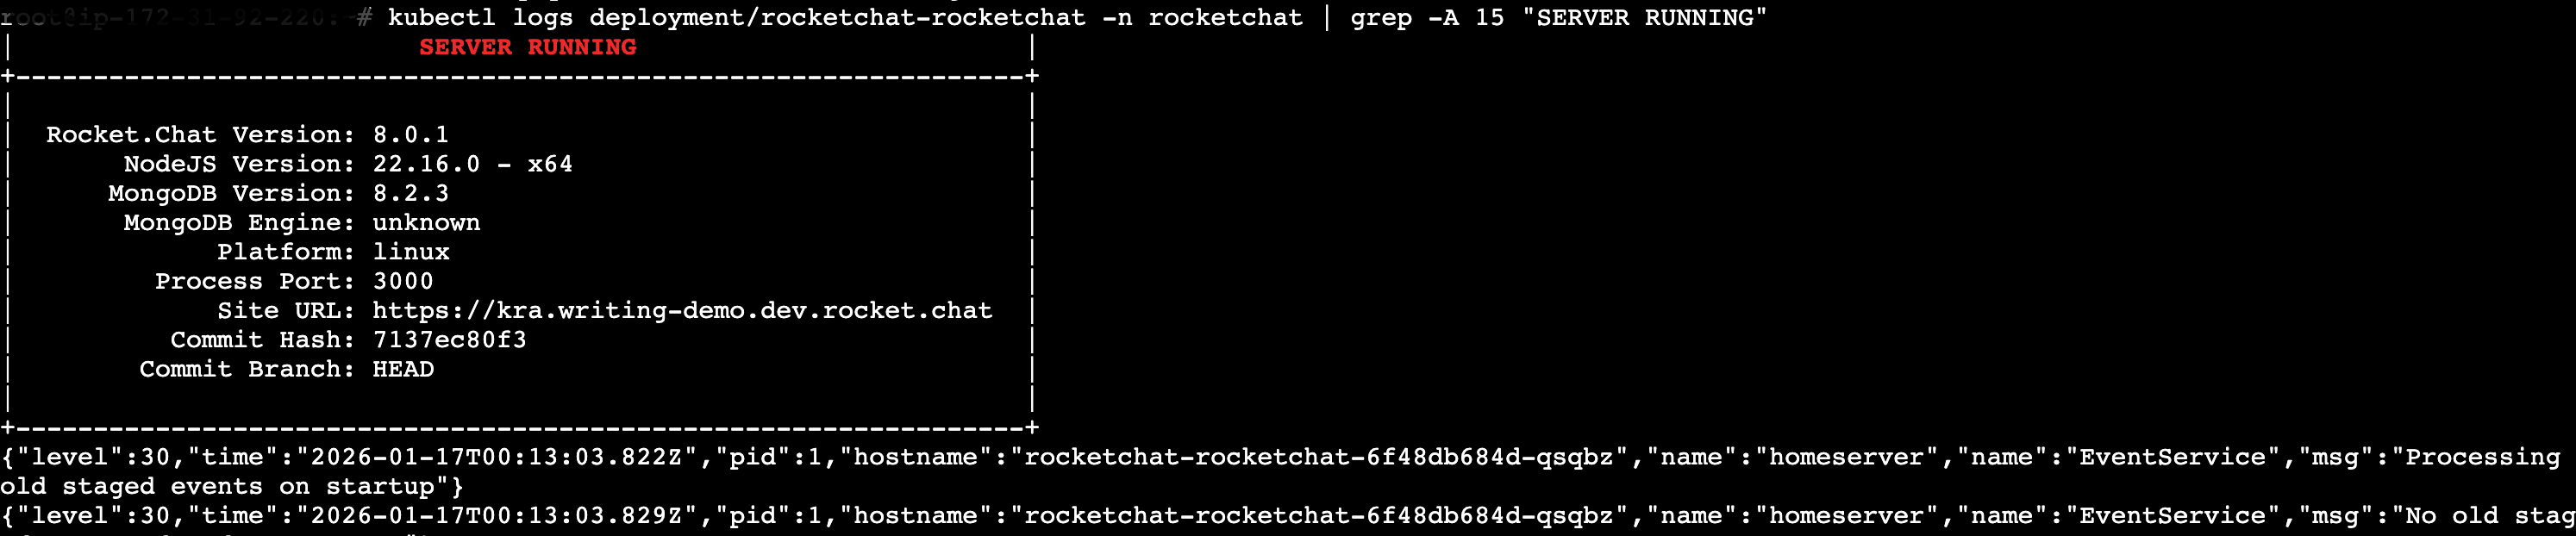
kubectl logs deployment/rocketchat-rocketchat -n rocketchat | grep -A 15 "SERVER RUNNING"You should see an output like:
If you encounter any issues with your deployment, refer to the Kubernetes Deployment FAQ.
Step 9: Access your Rocket.Chat workspace
After a few minutes, your Rocket.Chat workspace will be accessible at the configured domain (e.g., https://domain.xyz).
Follow the on-screen prompts to complete the initial setup and configuration of your workspace. During this process, your workspace and email will be registered to the Rocket.Chat Cloud portal, where you can manage your subscriptions.
Access monitoring dashboard
A Grafana dashboard will also be available at the path you configured (e.g., https://domain.xyz/grafana). Login with the following default credentials:
User:
adminPassword:
admin
You’ll be prompted to set a new password after your first login.
For more details on how to monitor your workspace metrics and logs, refer to the Monitor Workspace Logs and Metrics guide.
Step 10: Update file storage
By default, Rocket.Chat uses GridFS for file uploads. While easy to set up, GridFS increases database load and does not scale well for production. For higher performance and scalability, use a dedicated object storage service such as Amazon S3, Google Cloud Storage (GCS), or MinIO. Refer to the File Uploads guide for detailed instructions on configuring your preferred file storage solution.
Next steps
Congratulations! You have successfully deployed your Rocket.Chat workspace on Kubernetes. Your workspace is now live and ready to use. Next, check out the following resources to continue using your workspace:
User Guides: Learn the basics of your Rocket.Chat account, the types of rooms, and how to communicate with your workspace users.
Workspace Administration: Administrators and owners can set and manage various configurations.
Marketplace: Explore the available apps to enhance your workspace.
Updating Rocket.Chat on Kubernetes
Before you proceed, consult the general guidelines for updating Rocket.Chat.
To update your Rocket.Chat workspace to a new version,
Update the
image.tagfield in thevalues.yamlfile to the desired release:image: tag: <release>Replace
<release>with your chosen Rocket.Chat release number. For available versions, see Rocket.Chat release notes.After you update the image, run this command to apply changes:
helm upgrade rocketchat -f values.yaml rocketchat/rocketchat -n rocketchatThe
helm upgradecommand above does not pin a chart version, so it installs the latest Rocket.Chat Helm chart. Updating your app version may therefore also move you to a newer chart version automatically, which can include breaking changes. Visit Understanding Helm chart versions to learn more.After a few minutes, return to your workspace subscription to verify the updated Rocket.Chat version.
If you are upgrading to Helm chart 7.0.0 and you have
persistence.enabled: true, additional steps are required. Refer to Upgrading to Helm chart 7.0.0 for more details.
Updating MongoDB version on Kubernetes
Before changing MongoDB version, confirm all of the following:
Check the release notes to verify that your target MongoDB version is supported by your current Rocket.Chat release.
Ensure that the MongoDB image for the target version is available on Qauy.io under mongodb-community-server. Look for an image tagged
<target-version>-ubi8.Avoid skipping major versions. For example, to move from 4.4 to 6.0, you must upgrade to 5.0 first, ensure it is stable, and then proceed to 6.0.
Confirm the database
featureCompatibilityVersionaligns with the current major version. If you are running MongoDB 5.0 but your fCV is still set to 4.4, an upgrade to 6.0 will fail.To check your current
featureCompatibilityVersion:kubectl exec -it mongodb-0 -n rocketchat -- \ mongosh "mongodb://admin:$(kubectl get secret mongodb-admin-password -n rocketchat -o jsonpath='{.data.password}' | base64 -d)@localhost:27017/admin?authSource=admin" --eval "db.adminCommand({getParameter: 1, featureCompatibilityVersion: 1})"
To upgrade or downgrade your MongoDB version,
Run the patch command to upgrade MongoDB:
kubectl patch mongodbcommunity mongodb -n rocketchat \
  --type='json' -p='[{"op":  "replace", "path": "/spec/version", "value":"<mongodb-version>"}]'
Replace
<mongodb-version>your desired MongoDB version number.Check the pods and wait for MongoDB to start running again:
kubectl get pods -n rocketchatAfter it’s back up, confirm the MongoDB version running:
kubectl exec -it mongodb-0 -n rocketchat -- \
  mongosh "mongodb://admin:$(kubectl get secret mongodb-admin-password -n rocketchat -o jsonpath='{.data.password}' | base64 -d)@localhost:27017/admin?authSource=admin" \
  --eval "db.version()"
Additional operations
Set Rocket.Chat deployment environment variable on Kubernetes
Enviroment variables define key settings that influence or control how your workspace is deployed and configured. To set an environment variable in Kubernetes,
Open your
values.yamlfile:nano values.yamlAdd an
extraEnvsection and set the enviroment variable. For example, to override the SMTP Host setting, add:extraEnv: - name: OVERWRITE_SETTING_SMTP_Host value: "my.smtp.server.com"Finally, upgrade your deployment to apply the new changes:
helm upgrade rocketchat -f values.yaml rocketchat/rocketchat -n rocketchat
For a full list of available environment variables, refer to Deployment Environment Variables.
Scale MongoDB replicas
Since you’re using the MongoDB Community Operator, scaling the database is handled by patching the Custom Resource. This ensures the operator manages the safe addition of new replica members.
To scale MongoDB,
Update the number of MongoDB members in the ReplicaSet with this command:
kubectl patch mongodbcommunity mongodb -n rocketchat \
  --type='json' -p='[{"op": "replace", "path": "/spec/members", "value": <replica-set-number>}]'
Replace
<replica-set-number>with the number of replica sets you want to scale to.To verify, check the running pods for additional mongodb pods:
kubectl get pods -n rocketchat
Logging your deployment
To check the pods in your deployment:
kubectl get pods -n rocketchatTo view the logs for a specific Rocket.Chat pod:
kubectl logs -n rocketchat <pod-name>To stream real-time logs from a running Rocket.Chat pod:
kubectl logs -n rocketchat -f <pod-name>This helps in tracking ongoing events and debugging issues as they occur.
To check MongoDB replica set status:
kubectl exec -it mongodb-0 -n rocketchat -- \
  mongosh admin --eval "rs.status()"
Get the service details for the deployment:
kubectl get svc -n rocketchatTo check the current MongoDB version that is running:
kubectl exec -it mongodb-0 -n rocketchat -- \
  mongosh "mongodb://admin:$(kubectl get secret mongodb-admin-password -n rocketchat -o jsonpath='{.data.password}' | base64 -d)@localhost:27017/admin?authSource=admin" \
  --eval "db.version()"
If you encounter further issues with your deployment, refer to the Kubernetes Deployment FAQ.
Uninstalling Rocket.Chat on Kubernetes
To uninstall and delete the Rocket.Chat deployment, use the command:
helm delete rocketchat -n rocketchatYou said
Understanding Helm chart versions
Upgrading Rocket.Chat on Kubernetes involves more than updating the application version internally. A Helm deployment involves two independently versioned components:
The Rocket.Chat application version, which determines the version of Rocket.Chat running in your workspace.
The Helm chart version, which defines how Rocket.Chat is deployed and configured in your Kubernetes cluster.
These versions change independently. A new Rocket.Chat release does not always mean a new chart version, and a chart update may ship without a corresponding application release. When you run helm upgrade , Helm automatically pulls the latest chart version available in the repository unless it is pinned to a specific version. New chart releases can include updates to deployment templates, configuration options, and default values. In major chart releases, these changes may require you to update your existing values.yaml file before updating your deployment.
Upgrading to Helm chart 7.0.0
Helm chart 7.0.0 changes the default user and group that Rocket.Chat runs as. The chart now uses UID 65533 instead of 999 to match the UID baked into the Rocket.Chat image at build time. This change also resolves the EACCES error that causes Apps Engine to fail in Rocket.Chat 8.5.0 and later.
If your deployment does not use persistent storage (persistence.enabled: false), no additional steps are required. Update your workspace following the usual steps.
If your deployment uses persistent storage (persistence.enabled: true), the existing volume data is likely owned by UID 999. After updating, the pod runs as UID 65533 and cannot access that data, which causes the pod to fail to start or apps to fail with permission errors.
To prevent this, update the ownership of the existing volume data to UID 65533:
Identify the Persistent Volume Claim(PVC) used by Rocket.Chat:
kubectl get pvc -n rocketchatScale down the Rocket.Chat deployment so no pod is actively using the volume:
kubectl scale deployment rocketchat-rocketchat --replicas=0 -n rocketchatRun a temporary pod to update the volume ownership. Replace
<pvc-name>with the PVC name from step 1:kubectl run chown-migration --rm -it --restart=Never \ --overrides='{"spec":{"volumes":[{"name":"data","persistentVolumeClaim":{"claimName":"<pvc-name>-rocketchat"}}],"containers":[{"name":"chown","image":"busybox","command":["chown","-R","65533:65533","/data"],"volumeMounts":[{"name":"data","mountPath":"/data"}]}]}}' \ --image=busyboxWith ownership corrected, update the deployment:
helm upgrade rocketchat -f values.yaml rocketchat/rocketchat -n rocketchat
Reverting to UID 999 is only safe on Rocket.Chat versions before 8.5.0. From 8.5.0 onward, Apps Engine requires write access to paths owned by UID 65533. Running the container as UID 999 on those versions will cause apps to fail to start. If you run Rocket.Chat 8.5.0 or later, you must migrate the volume rather than override the UID.
To further explore and enhance your workspace on Kubernetes, scaling your workspace with microservices.