.svg)
In a monolithic deployment, Rocket.Chat runs as a single application process where all core components (WebSocket handling, authentication, presence, etc) operate together. This model is straightforward to deploy and manage at a small scale. However, as usage grows, resource contention becomes a concern. When one component experiences heavy load, it can impact the performance of the entire application.
In a microservices architecture, these core components are separated into independent services. Each service runs in its own container and can be scaled, updated, or restarted without affecting the others. For example, if WebSocket connections become a bottleneck, you can scale only the WebSocket service while leaving authentication, presence, and other services unchanged. This approach provides better resource isolation and more controlled scaling at larger workloads.
Rocket.Chat officially supports deploying microservices using Kubernetes with the official Helm chart. Direct Docker microservice deployment is not supported.
In this guide, you’ll learn:
The key components of the Rocket.Chat microservice architecture
Step-by-step instructions for scaling your existing Rocket.Chat workspace with microservices
When you should scale with microservices
Consider scaling up your workspace if:
You’re seeing performance degradation during peak usage.
You need high availability.
You want to scale individual bottlenecks (e.g., WebSocket connections) without scaling everything.
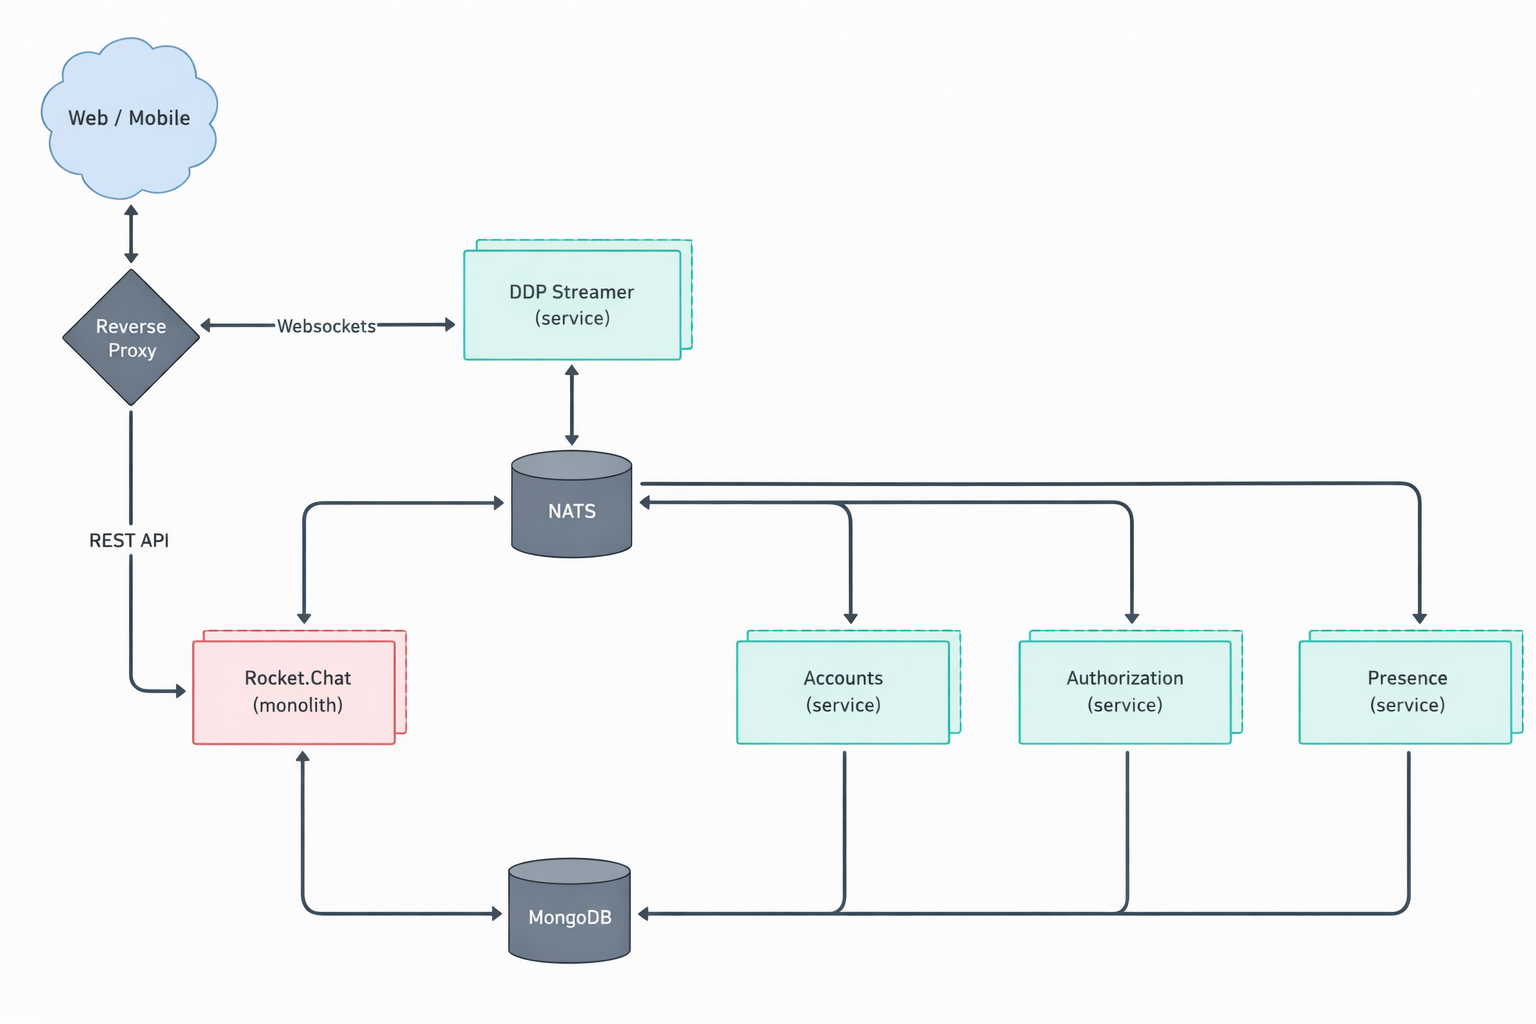
Key components of Rocket.Chat microservices
Rocket.Chat’s microservices architecture includes several components, each focused on a specific feature. These components work together to create a fully operational workspace. Before you configure scaling, it helps to understand what each service does and how it relates to the others.
Component | Description |
|---|---|
authorization ( | Manages role and permission validation, ensuring users only access what they’re authorized to. |
accounts ( | Handles user account management and login authentication. |
presence ( | Tracks and manages user presence status across the workspace. |
ddp-streamer ( | Handles all WebSocket connections using the Distributed Data Protocol (DDP). |
nats ( | A high-performance messaging system that acts as a central message bus for all microservices. Instead of services communicating directly with each other, requests are routed through NATS, which forwards them to the correct destination. To learn more about NAT, see the official documentation. |
The central Rocket.Chat monolith ( | In a microservice deployment, the features of each individual service are disabled within the central monolith. This allows the dedicated microservice to take over its respective function. |
Rocket.Chat's microservices deployment is illustrated in the diagram below.
Scaling your Rocket.Chat workspace with microservices
This guide explains how to scale an existing Rocket.Chat microservices deployment that is already running with a single replica.
If you have not yet deployed Rocket.Chat on Kubernetes, start with the Deploy with Kubernetes guide.
To scale your deployment, you'll need to modify the values.yaml file and then upgrade your Rocket.Chat deployment using Helm.
Step 1: Configure replicas
A replica is a running copy of a service. Running multiple replicas means that if one copy fails or becomes overloaded, the others continue to serve traffic. This is the core mechanism of scaling.
To configure replicas, choose between setting a global count for all services or specifying a count for each service individually.
Setting a global replica count is the quickest approach and works well if you want uniform scaling across your deployment. It means setting the same number of replicas for all microservices at once.
To scale all services to the same number of replicas, modify the replicaCount in your values.yaml file. For example, to set two replicas for all services:
microservices:
  enabled: true  # Enable microservices
replicaCount: 2
For more granular control, you can specify a unique number of replicas for each service. This is useful if certain services need to handle more load than others.
Locate the microservices section in the values.yaml file, remove replicaCount and specify replicas for each service:
microservices:
  enabled: true
  presence:
    replicas: 2
  ddpStreamer:
    replicas: 2
  account:
    replicas: 2
  authorization:
    replicas: 2
  nats:
    replicas: 2
For the
ddp-streamer, plan 1 pod per 500 concurrent users.Remember to remove
replicaCountif you’re defining replicas individually.
Step 2: Update Rocket.Chat
After saving your changes in
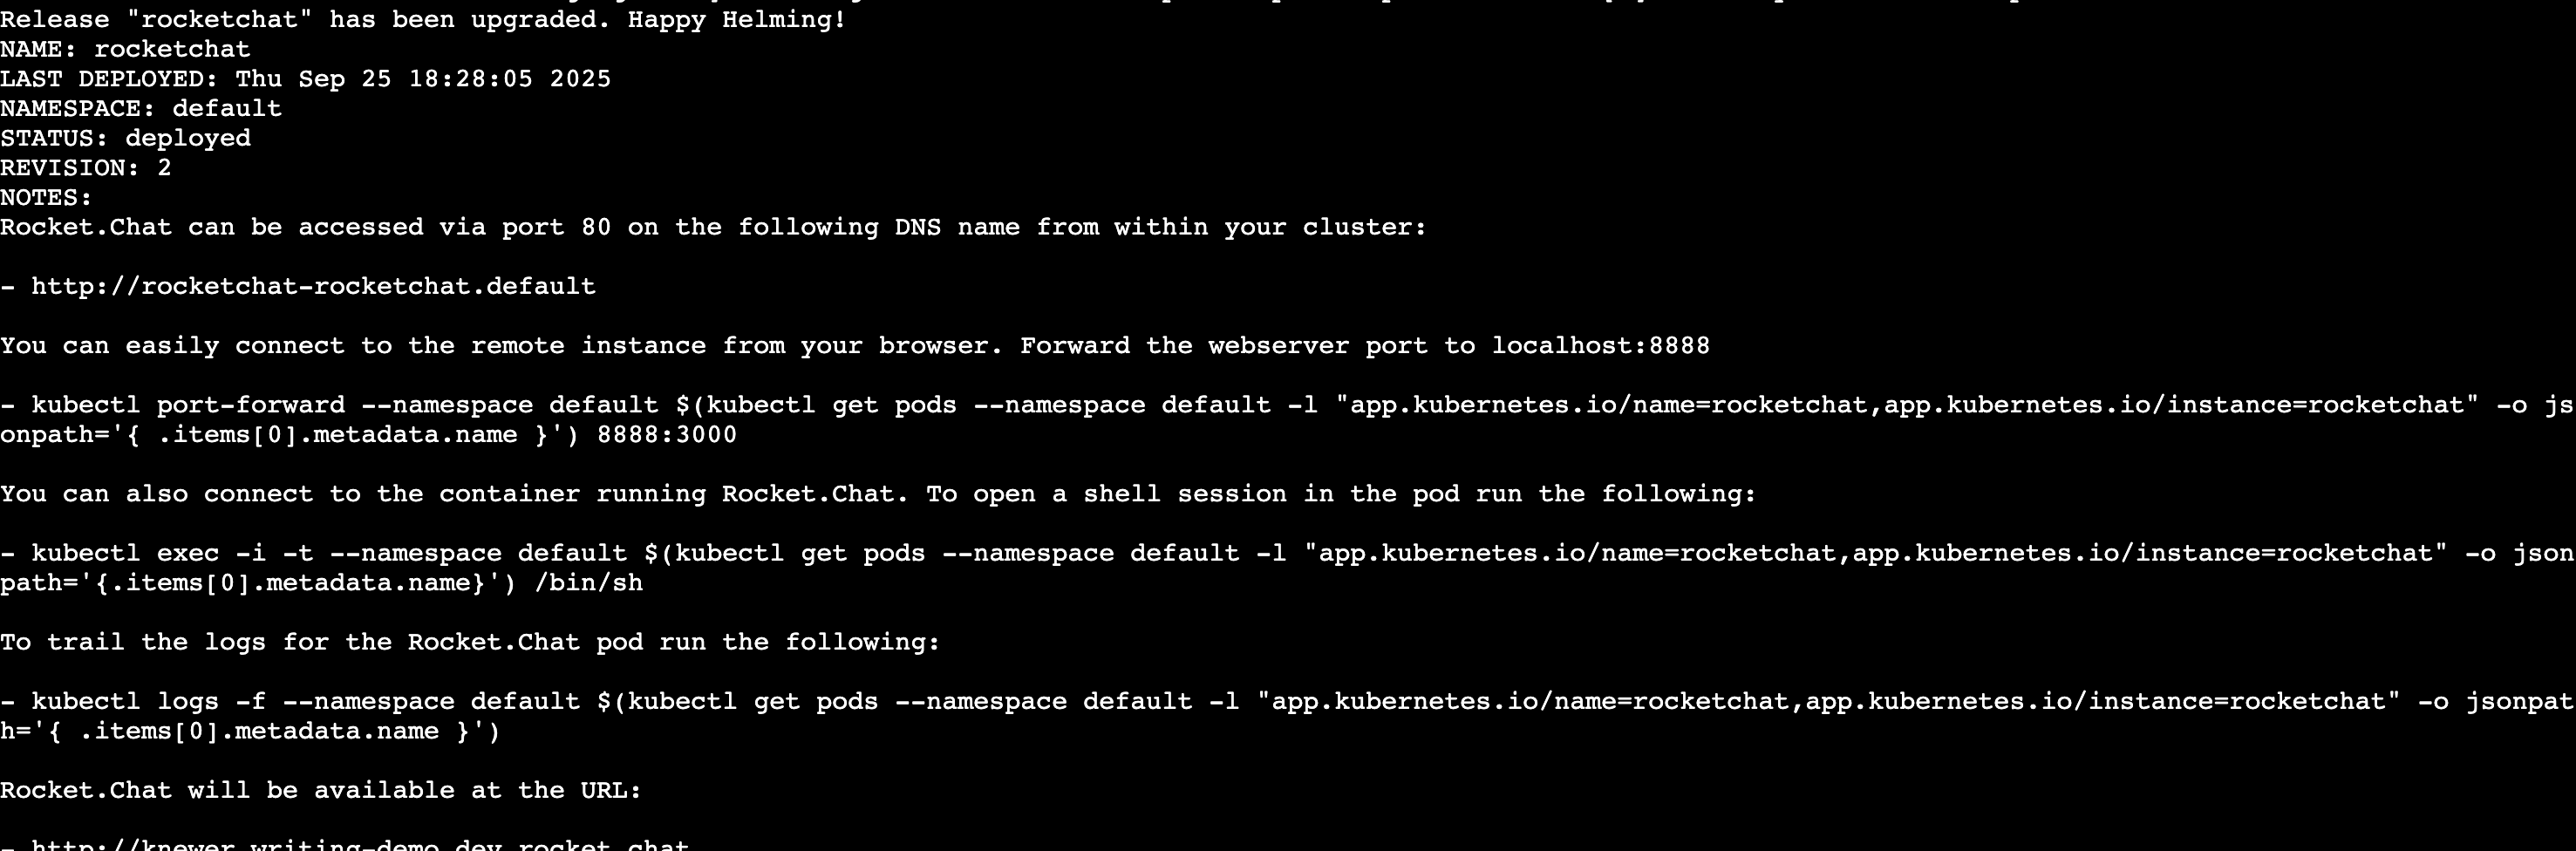
values.yaml, upgrade your deployment to apply them:helm upgrade rocketchat -f values.yaml rocketchat/rocketchat -n rocketchatIf the upgrade is successful, you’ll get a response similar to the following:
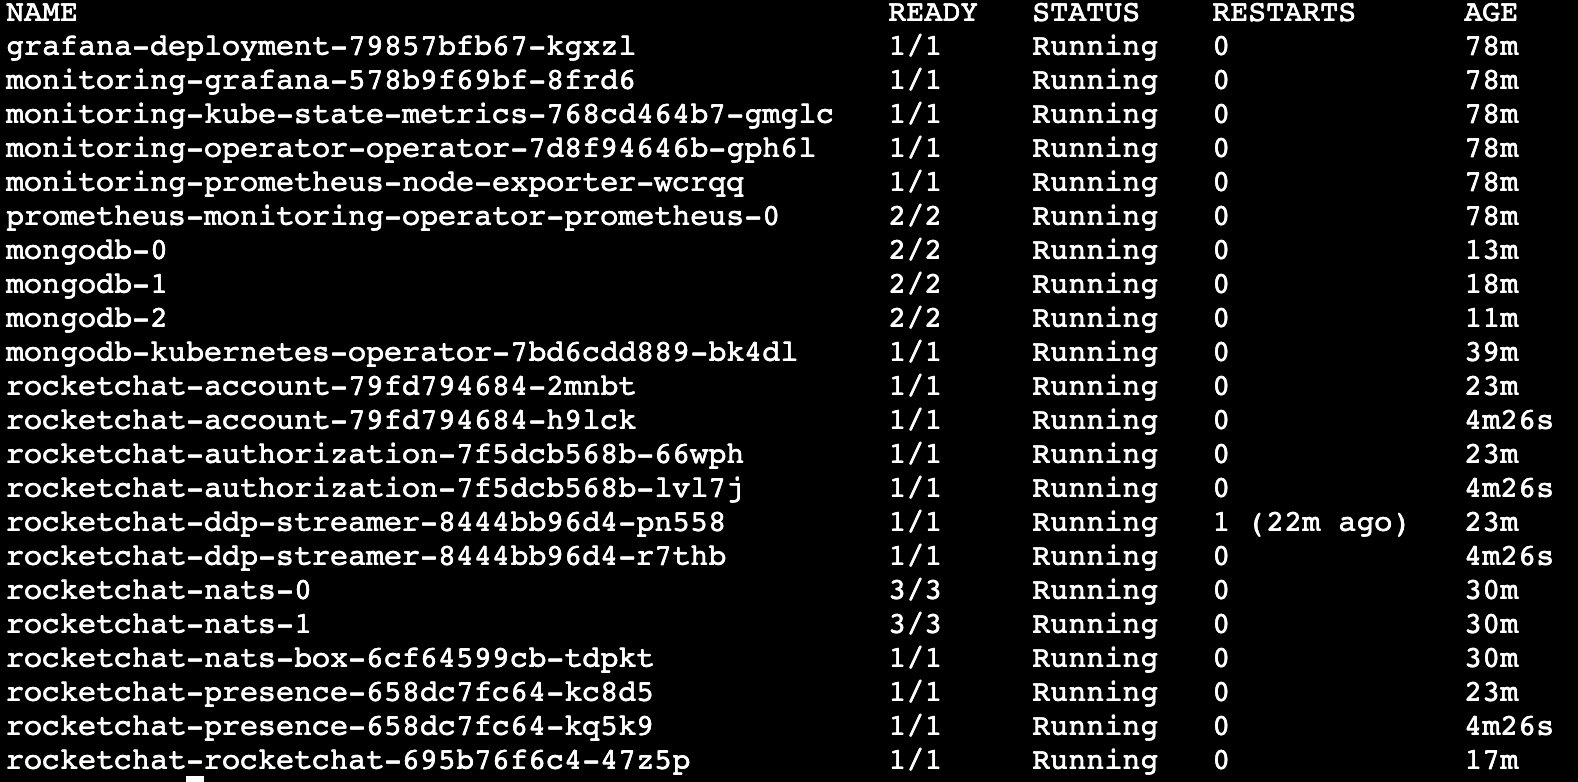
Once the update is complete, you can verify the new services with this command:
kubectl get pods -n rocketchatIf you set a global replica count, you should see multiple rocketchat services running:
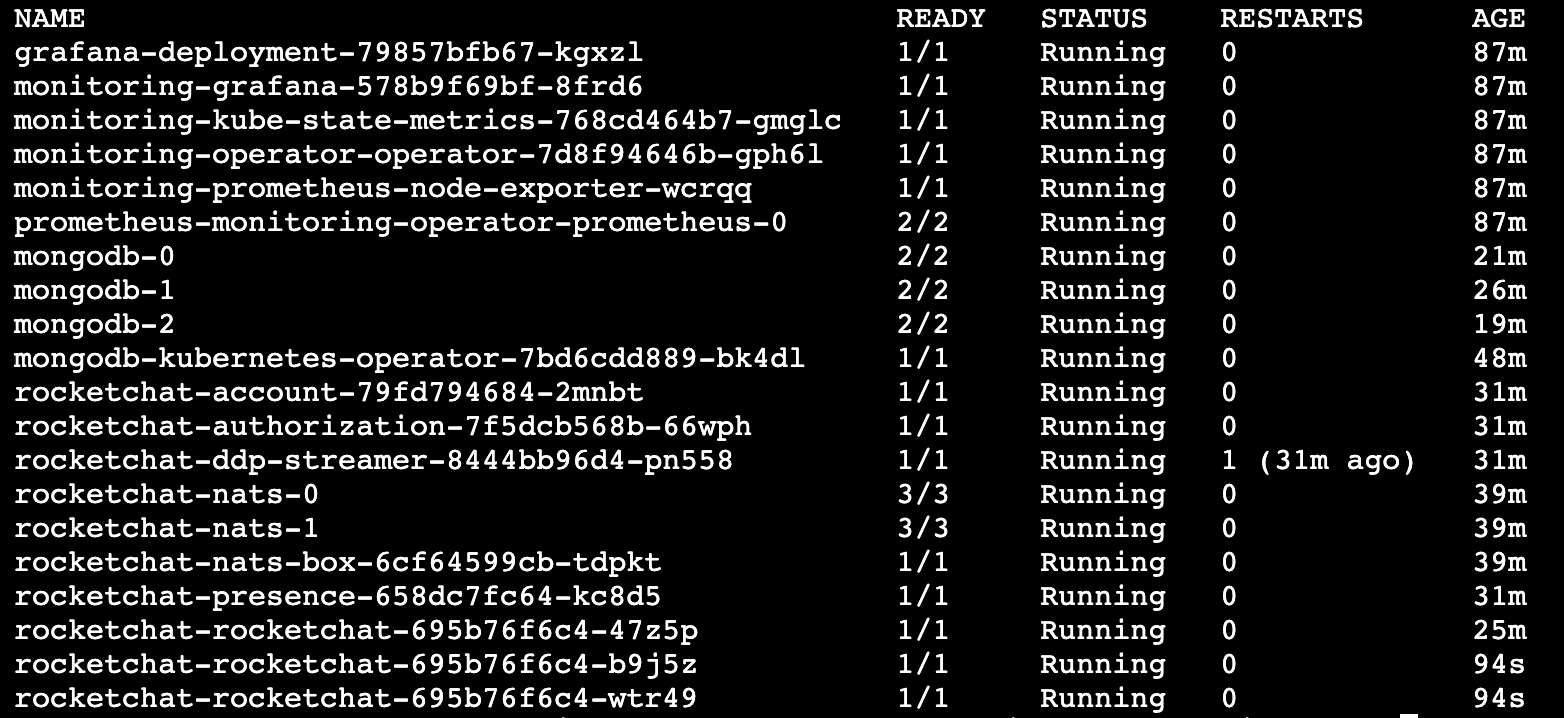
If you set a replica for individual services, you should see should see multiple replicas per service depending on your configuration:
Additionally, you can confirm the number of running instances directly from the workspace UI.
Go to Manage
 > Workspace.
Click the Instances button under Deployment.
A list of all active Rocket.Chat instances will be displayed.
Congratulations! You have successfully scaled your Rocket.Chat workspace using microservices. Your workspace is now better equipped to handle a larger number of users and provides improved resilience. You can now return to your workspace and continue chatting with your teammates.