The Rocket.Chat AI app is currently in beta. For feedback, reach out to us on the AI app channel. Before you can use the app, you need to deploy and configure an LLM. For the setup details, refer to the AI app setup repository.
Contact our sales team to enable the app after installation.
The Rocket.Chat AI assistant app is powered by the Retrieval-Augmented Generation (RAG) technique. This technique allows large language models (LLMs) to connect with external resources, giving users access to the latest, most accurate information. To use the Rocket.Chat AI app, you need a self-hosted LLM of your choice. This allows for greater information accuracy while keeping it secure.
Key features of the Rocket.Chat AI app
Get answers to your general or business-specific queries.
Get a summary of thread messages to stay up-to-date on important conversations quickly.
Get a summary of livechat messages. This helps agents understand the context of an ongoing customer conversation.
In this document, you will learn about the app installation, configuration, and usage details.
Install the app
Follow these steps in your workspace:
Go to Marketplace
 > Explore and search for Rocket.Chat AI.
Click Install and accept the required permissions.
By default, the app will be disabled. To enable it, contact our sales team.
Configure the app
Before you configure the app settings, ensure that your workspace admin has set up the LLM. Follow the Rocket.Chat AI App Setup Guide for details and further examples for the settings.
In the app Settings tab, update the following:
Field | Description |
|---|---|
Language model | |
Model Selection* | Enter the name of the AI model. You can refer to your LLM provider for this. For example, |
Model URL* | Enter the model URL. For example, Don't include the slash |
Model API key | Enter the API key if your LLM provider requires it to make calls. For example, cloud providers such as OpenAI and Gemini require an API key. |
Assistant personalization | |
Assistant Name* | Provide a name for the AI Assistant. By default, the name is Rocket.Chat Assistant. This name is used to greet the user if asked for a name. For example, "Hi, I am the AI Assistant. How can I help you?". |
Custom instructions | Customize how the bot responds to prompts. For example, you can add instructions to include the users involved in conversation summaries. |
Vector database | |
Vector database selection* | Select the vector database to be used for the RAG. The vector database retrieves the relevant documents from the knowledge base. Currently, only Milvus is supported. |
Vector database URL* | Enter the URL of the vector database. For example, |
Vector database collection* | Enter the name of the collection in the vector database. For example, If you are using the Rubra AI Assistant, you can enter the URL as If there are any errors, the values will not be replaced and will be reverted to the original values. |
Vector database API key* | Enter the API key for the vector database. This is required for authentication. For Milvus, you should use a colon (:) to concatenate your username and password to access your Milvus instance. For example, |
Vector database text field* | Enter the field's name in the vector database containing the text data. For example, |
Number of relevant results (top k)* | Configure the number of top relevant results from the knowledge base you want to send to the LLM to answer a query. By default, the value is ten. Instead of retrieving only the top ten relevant paragraphs to answer a question, you can configure it to 15 or 20. Higher values provide more context but may increase token usage and risk overwhelming the LLM. Lower values keep the context concise and focused. Keep in mind that if the data is not relevant, the LLM may return irrelevant or conflicting information. |
Embedding model | |
Embedding model selection* | Select the embedding model to be used for the RAG. The embedding model is used to convert the text data into vectors. Currently, only the locally deployed model is supported. |
Embedding model URL* | Enter the URL of the embedding model. For example, |
AI agent | |
Agentic pipeline* | Enable this option if you are implementing an agentic RAG system. By default, this option is disabled.
|
Agentic pipeline config* | Enter the agentic pipeline configuration in the JSON format. Refer to the Agentic pipeline configuration details. |
Query augmentation | |
Guardrail & query augmentation* | Enable this setting to enhance responses to user prompts and follow-up questions. Additionally, you can implement adherence to policies and set up safety guardrails to prevent users from prompting harmful queries. Using this setting is optional. |
Model name | By default, the model you selected in the Language model section is used for the query augmentation feature. You can provide another model name here, and this will override the one in the Language model section. |
Prompt configuration | Enter additional custom rules to define guardrails. This means that in this field, you can provide prompt instructions so that the AI bot doesn’t provide answers to unsafe prompts. For example, you can enter something like this:
Now, if a user sends a query to the AI bot using an unsafe prompt (for example,
|
Note that the embedding model inference server must have a fixed format of payload and response as input and output, respectively. Below is the format of the input and output:
// Input
{
    [
        "text1", "text2", ...
    ]
}
// Output
{
"embeddings": [
[0.1, 0.2, 0.3, ...],
[0.4, 0.5, 0.6, ...]
]
}Agentic pipeline configuration details
The elements in the JSON configuration string are as follows:
endpoint
endpoint (required): Enter the endpoint to execute an agent query. For example,
"endpoint": "http://ec2-xx-xxx-xxx-xxx.compute-1.amazonaws.com/agents/208f928d-884f-4935-8eaf-65759db3aa5d/execute",headers
headers (required): An object of key-value pairs required for the endpoint, such as authentication tokens. For example,
"headers": {
      "X-LLM-ID": "2c23e8f3-xxxx-xxxx-xxxx-xxxxxxxxxb54",
      "X-Pipeline-ID": "1ebec720-xxxx-xxxx-xxxx-xxxxxxxxxx71",
      "Content-Type": "application/json",
      "Accept": "application/json",
      "X-API-KEY": "f1efb013-xxxx-xxxx-xxxx-xxxxxxxxxx7a",
      "X-API-KEY-SECRET": "f4ai-supersecret-key-no-sharing-ok?"
    },
body
body(required): Enter the request body that is required by the endpoint, as per the API specifications. For example,
"body": {
      "prompt": {
        "query": "{{user.message}}",
        "ragPrompt": "{{prompt.rag}}",
        "msgs": "{{prompt.context}}"
      },
Here, {{user.message}} is a variable representing the templates that can be used to pass additional information when calling the endpoint. The app internally replaces the templates with the actual values. Currently, the following values are available:
### User Context Variables
- {{user.message}}: The actual message sent by the user (e.g., "How can I help?")
- {{user.name}}: Username of the message sender (e.g., "john.doe")
- {{user.roles}}: Array of roles assigned to the user (e.g., ["admin", "user"])
- {{user.role}}: Primary role of the user (e.g., "admin")

### Room Context Variables
- {{room.name}}: Display name of the chat room (e.g., "General")

### Prompt Context Variables
- {{prompt.query}}: The user's original message (e.g., "How can I help?")
- {{prompt.context}}: Array of relevant message strings (e.g., ["previous message 1", "previous message 2"])
- {{prompt.rag}}: RAG-specific prompt template (e.g., "Given the context...")
- {{prompt.guardrails}}: Prompt injection prevention rules (e.g., "Ensure responses are...")
Keep in mind that the app expects a response to the prompt from the API, so the API must return a text answer, which will be sent to the user.
Use the Rocket.Chat AI app
You can use the app in any of the following ways:
Create a DM with the AI app
From your workspace menu, click Create New > Direct messages.
In the DM, send a prompt with your query, and the bot responds in the thread.
Mention the Rocket.Chat AI bot
In any room, type
@rocket-chat-ai.botfollowed by your question or prompt.The bot responds in the thread. All room members can view the interaction and response.
Summarize unreads
In any room, click the AI Actions button
 from the room actions menu.
 Select Summarize unreads to receive conversation summaries from the app bot in the same room.
Summarize discussion rooms
In any discussion, click the AI Actions button
 from the room actions menu.
Select Summarize room to receive conversation summaries from the app bot in the same discussion room and in the DM.
Summarize threads
In any channel, hover over the message in the thread you want to summarize.
Click the AI Actions button
 from the message actions menu.
Click Summarize until here. The AI Assistant will summarize the thread in the thread itself and in the DM.
Note that thread summary is not supported in DMs.
Summarize livechat conversations
In any livechat room, click the AI Actions button
 from the room actions menu.
Click Summarize chat. The AI Assistant will summarize the livechat conversation in the same room. According to the conversation, the bot provides information about the users, the issue, the agent's response, and any follow-up to the conversation.
Currently, the app summarizes up to a 100 messages.
Troubleshooting
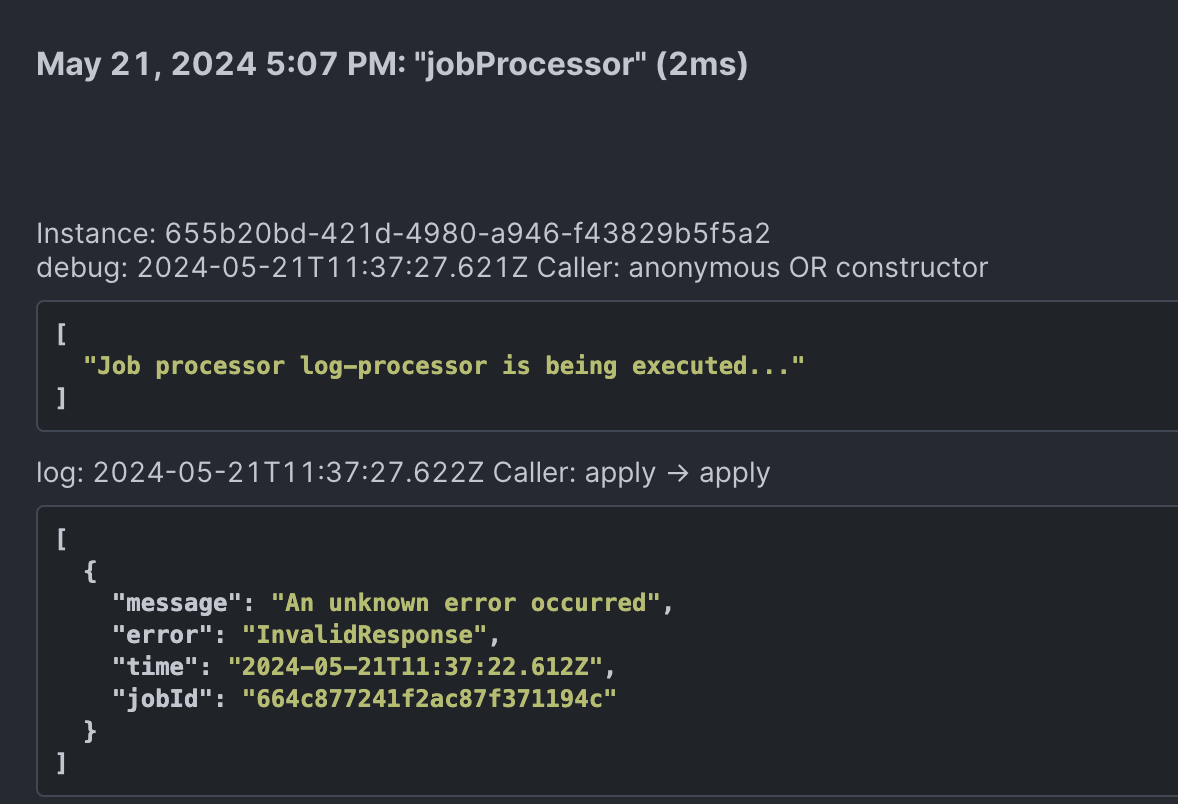
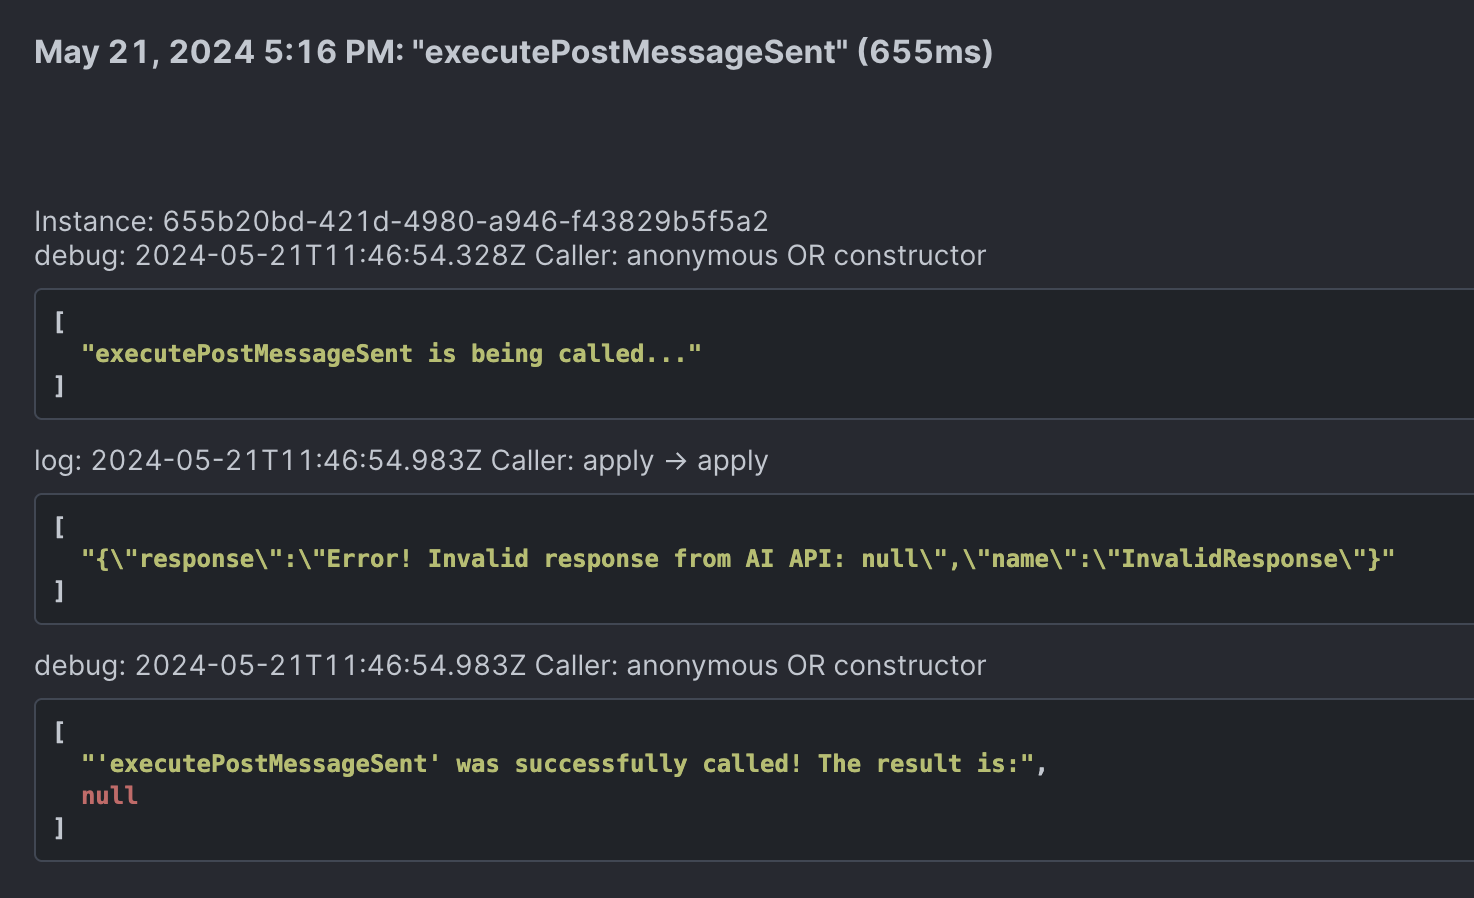
The app will always show a default error message if there is an error: An unexpected error occurred, please try again. If you are an admin, go to the App Info page and click on the Logs tab to see the different sections of the logs. The logs will help you debug the issue.
If the interaction was a UI interaction, the logs will be listed under the jobProcessor section. The following screenshot shows an example:

The logs will be listed under the executePostMessageSent section for any other type of interaction. The following screenshot shows an example:
