Email configuration is required to send emails to workspace users for notifications and account verification. This is also useful when you use the Mailer and Email Inboxes features to communicate with people inside and outside your organization. This page guides you through configuring the SMTP settings for your Rocket.Chat workspace.
Configure SMTP settings
This configuration is only available for self-managed workspaces. Cloud-hosted workspaces already have this pre-configured.
(Self-managed workspaces are workspaces that you deploy on your own infrastructure. Cloud-hosted workspaces are those for which Rocket.Chat provides cloud-hosting services if you don’t want to deploy a workspace on your infrastructure.)
In your workspace, go to Manage ![]() > Workspace > Settings > Email. On the Email settings page, select the SMTP tab. In this section, update the following settings:
> Workspace > Settings > Email. On the Email settings page, select the SMTP tab. In this section, update the following settings:
Field | Description |
|---|---|
Protocol | Select the |
Host | Enter your SMTP server hostname. For example, |
Port | Enter the SMTP port (usually 587 for modern secured SMTP servers). |
IgnoreTLS | Enable this option to ignore TLS (Transport Layer Security). |
Pool | Enable this option to use pooled connections. Otherwise, a new connection is created for every mail. |
Username | Enter your SMTP username. |
Password | Enter your SMTP password. |
From Email | Enter the email to be shown as the sender. |
Once you’ve updated the settings, click Save changes. Your workspace’s email configuration is now complete.
Use the Send a test mail to my user button to verify the settings. If the connection is successful, you should receive an email in your user’s email inbox. If you are having issues with the connection, check the workspace logs for potential causes.
Define email templates
Now that the email configuration is complete, you can customize some pre-defined email templates offered by Rocket.Chat. Depending on your workspace settings, these emails will be sent to workspace users when certain actions are triggered. Customizing email templates is optional; your workspace will consider the default templates provided by Rocket.Chat.
To access the email template settings, go to Manage ![]() > Workspace > Settings > Email. The Email settings page contains template options for different cases. Let’s learn about each option in detail.
> Workspace > Settings > Email. The Email settings page contains template options for different cases. Let’s learn about each option in detail.
Available placeholder fields can be seen at the bottom of the field being edited.
You can use Rocket.Chat internationalization engine by wrapping sentence string with
{ }, see all internationalization strings here.The email body can take in placeholder values used to set customized data, for example
[Site_Name]is replaced with your Rocket.Chat server name.
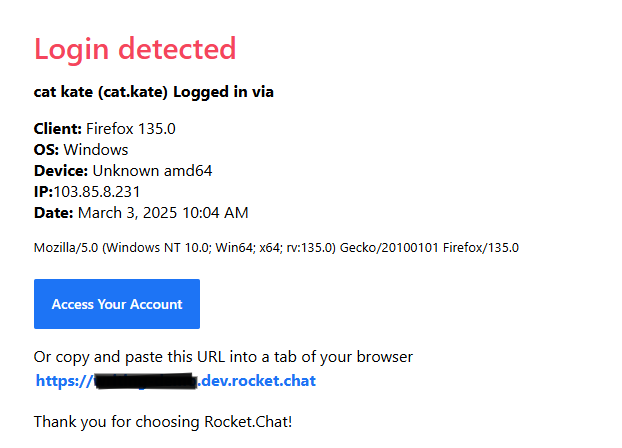
Device management - login detected
Users receive this email when a workspace login is detected from a new device. Update the following fields:
Subject: The email subject.
Body: By default, the email body content is populated. You can modify the HTML tags according to your preference. The default body text and placeholders are as follows:
Placeholder | Description |
|---|---|
| This is the heading in the email body. |
| The name and username are displayed with the text |
| This displays the browser information that the user used to access the workspace. |
| This displays the user’s device OS information. |
| This displays the user’s device information. |
| This displays the IP used to access the workspace. |
| This displays the date and time when the user accessed the workspace. |
| Additional device and browser information. |
| This is displayed as a button in the email body containing the link to the workspace URL. |
| This is displayed as text below the button. It contains the workspace URL. |
| Additional text at the end of the email body. |
The email body HTML code looks something like this:
<h2 class="rc-color">{Login_Detected}</h2>
<p><strong>[name] ([username]) {Logged_In_Via}</strong></p>
<p><strong>{Device_Management_Client}:</strong> [browserInfo]<br>
<strong>{Device_Management_OS}:</strong> [osInfo]<br>
<strong>{Device_Management_Device}:</strong> [deviceInfo]<br>
<strong>{Device_Management_IP}:</strong>[ipInfo]<br>
<strong>{Date}:</strong> [date]</p>
<p><small>[userAgent]</small></p>
<a class="btn" href="[Site_URL]">{Access_Your_Account}</a>
<p>{Or_Copy_And_Paste_This_URL_Into_A_Tab_Of_Your_Browser}<br>
<a href="[Site_URL]">[SITE_URL]</a></p>
<p>{Thank_You_For_Choosing_RocketChat}</p>
The email that the user receives looks something like this:
Email address changed
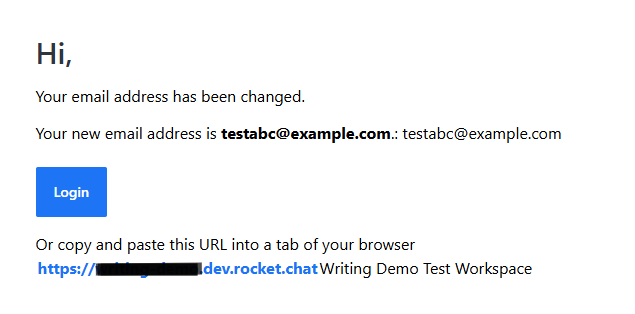
Users receive this email when a user’s email address has been changed. Update the following fields:
Subject: The email subject.
Body: By default, the email body content is populated. You can modify the HTML tags according to your preference. You can also add placeholders as follows:
Placeholder | Description |
|---|---|
| The user’s new email address. |
| The workspace name. |
| The workspace URL. |
An example of the email body HTML is as follows:
<h2>{Hi},</h2>
<p>{Your_email_address_has_changed}</p>
<p>{Your_new_email_is_email}: [email]</p>
<a class="btn" target="_blank" href="[Site_URL]">{Login}</a>
<p>{Or_Copy_And_Paste_This_URL_Into_A_Tab_Of_Your_Browser}<br>
<a href="[Site_URL]">[SITE_URL]</a>[Site_Name]</p>
The email that the user receives looks like this:
Forgot password
Users receive this email when they click the Forgot password button. The email prompts users to reset their password. Update the following fields:
Subject: Subject of the email.
Body: By default, the email body content is populated. You can modify the HTML tags according to your preference. You can also add placeholders as follows:
Placeholder | Description |
|---|---|
| The password recovery URL. |
| The user's full name, first name, and last name, respectively. |
| The user’s email address. |
| The workspace name. |
| The workspace URL. |
An example of the email body HTML is as follows:
<h2>{Forgot_password}</h2>
<p>{Lets_get_you_new_one_}</p>
<a class="btn" href="[Forgot_Password_Url]">{Reset}</a>
<p>First name: [fname]<br>
  Last name: [lname]<br>
  Full name: [name]</p>
<p class="advice">{If_you_didnt_ask_for_reset_ignore_this_email}</p>
<p>[Site_Name],[Site_URL]</p>
<a href="[Site_URL]">[SITE_URL]</a>
The email that the user receives looks like this: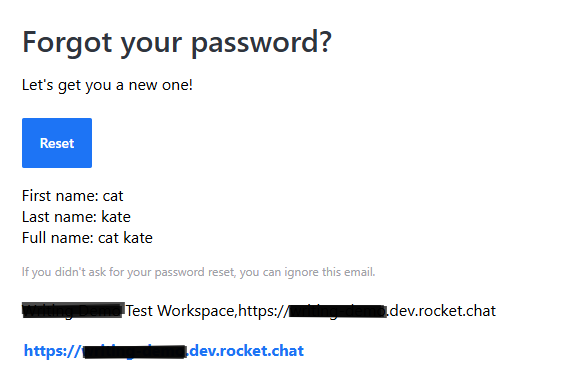
Invitation
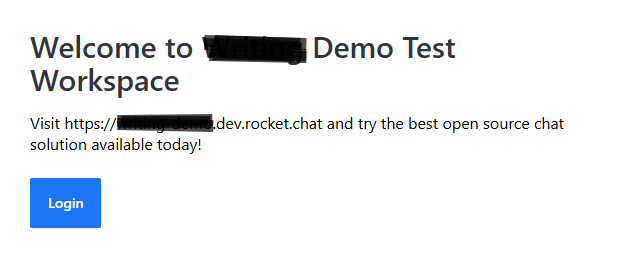
Email template for when a user is invited to join the workspace. Update the following fields:
Subject: The email subject.
Body: By default, the email body content is populated. You can modify the HTML tags according to your preference. You can also add placeholders as follows:
Placeholder | Description |
|---|---|
| The user’s email address. |
| The workspace name. |
| The workspace URL. |
The email body HTML is as follows:
<h2>{Welcome_to}</h2>
<p>{Visit_Site_Url_and_try_the_best_open_source_chat_solution_available_today}</p>
<a class="btn" href="[Site_URL]">{Join_Chat}</a>
The email that the user receives looks like this:
Password changed
Users receive this email as a notification when their password has been changed by an admin. Admins can edit a user’s details and select the option to Set password randomly and send by email from the Users tab. See how to do this in the Manage Workspace Users section.
Update the following fields:
Subject: The email subject.
Body: By default, the email body content is populated. You can modify the HTML tags according to your preference. You can also add placeholders as follows:
Placeholder | Description |
|---|---|
| The user’s temporary password. |
| The user's full name, first name, and last name, respectively. |
| The user’s email address. |
| The workspace name. |
| The workspace URL. |
The email body HTML is as follows:
<h2>{Hi},</h2>
<p>{Your_password_was_changed_by_an_admin}</p>
<p>{Your_temporary_password_is_password}</p>
<a class="btn" target="_blank" href="[Site_URL]">{Login}</a>
The email that the user receives looks like this:
.png)
Registration
New users receive this email upon registering to the workspace. Update the following fields:
Subject: Email subject.
Body: By default, the email body content is populated. You can modify the HTML tags according to your preference. You can also add placeholders as follows:
Placeholder | Description |
|---|---|
| The user's full name, first name, and last name, respectively. |
| The user’s email address. |
| The workspace name. |
| The workspace URL. |
The email body HTML is as follows:
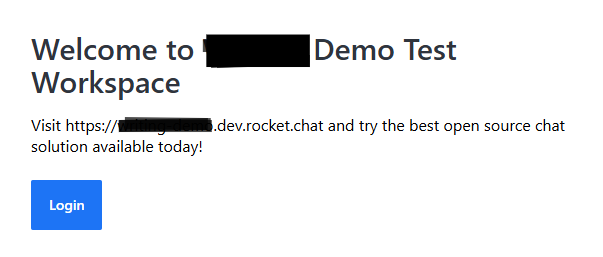
<h2>{Welcome_to}</h2>
<p>{Visit_Site_Url_and_try_the_best_open_source_chat_solution_available_today}</p>
<a class="btn" target="_blank" href="[Site_URL]">{Login}</a>
The email that the user receives looks like this:
Registration via admin
New users receive this email when they are registered to the workspace by an admin. Update the following fields:
Subject: The email subject.
Body: By default, the email body content is populated. You can modify the HTML tags according to your preference. You can also add placeholders as follows:
Placeholder | Description |
|---|---|
| The user's full name, first name, and last name, respectively. |
| The user’s email address. |
| The workspace name. |
| The workspace URL. |
The email body HTML is as follows:
<h2>{Welcome_to}</h2>
<p>{Visit_Site_Url_and_try_the_best_open_source_chat_solution_available_today}</p>
<a class="btn" target="_blank" href="[Site_URL]">{Login}</a>
The email that the user receives looks like this:

Verification
Email template to use when sending user verification. For example, this email is sent when a user updates their email address. Update the following fields:
Subject: The email subject.
Body: By default, the email body content is populated. You can modify the HTML tags according to your preference. You can also add placeholders as follows:
Placeholder | Description |
|---|---|
| The workspace verification URL. |
| The user's full name, first name, and last name, respectively. |
| The user’s email address. |
| The workspace name. |
| The workspace URL. |
An example of the email body HTML is as follows:
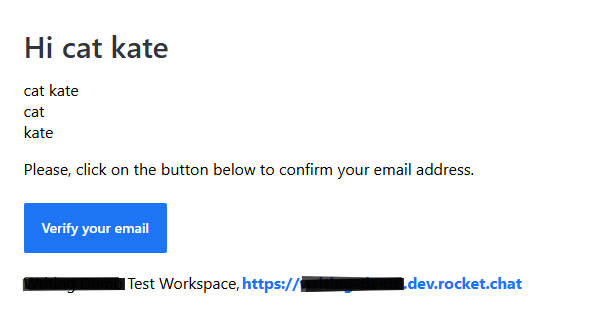
<h2>{Hi_username}</h2>
<p>[name]<br>[fname]<br>[lname]</p>
<p>{Verification_email_body}</p><a class="btn" target="_blank" href="[Verification_Url]">{Verify_your_email}</a>
<p>[Site_Name],<a href="[Site_URL]">[Site_URL]</a></p>
The email that the user receives looks like this:
Additional email settings
Update the following settings to customize the email configuration according to your needs:
Header and footer
Defines the header and footer style to use for all your emails. Update the following fields:
Header: Header to use for all emails sent.
Footer: The email footer to use for all emails.
Footer When Direct Reply is Enabled: Defines the footer for when direct reply is enabled.
Offline message
Use Deep Link URL Format: When enabled, deep linking is made possible in emails sent.
Privacy
Set the level of privacy to the emails sent.
Show Message in Email Notification: Whether or not to show messages in email notifications.
Add Sender to Reply-To: When enabled, message senders will be added to the
Reply-Toemail header property.
Style
Here, you define the styling to be applied to all emails.
Send only plain text emails: When enabled, emails are sent in plain text only.
Email Style: Write CSS to style every email.
Next steps
Once your SMTP and email settings are configured, you can take any of the following actions:
Invite users to the workspace via email invites.
Configure email direct reply so that users can reply to the email notifications.
Use the Mailer feature to send emails to your workspace users.
Configure Email Inboxes to connect with external customers and citizens.
Additionally, you can also set up 2FA so that users can receive TOTP codes via email.