The Omnichannel Business Hours feature allows companies to define their operating hours, which can be displayed on the Livechat widget, guiding customers to reach out only during those hours. This system helps manage agent workloads by alerting them of inquiries strictly within these hours, ensuring timely customer assistance.
Types of business hours
Rocket.Chat provides two types of business hours:
Single: Every agent and department adheres to one uniform business hour. It is ideal for teams sharing the same shift and time zone.
Multiple: This mode allows you to define distinct working hours for different departments, which is especially useful for teams in varied time zones. The workspace has a default business hour, but custom hours can be set for specific departments. Agents in those departments primarily handle chats during those custom hours. Outside of that, their livechat status ideally goes offline. Multiple business hour mode is exclusively available to workspaces subscribed to any of Rocket.Chat's premium plans.
Single type business hours
Use the single type of business hours if your operating hours are limited to one timezone and your agents share the same working hours. For example, agents attend to visitors from Monday to Friday, 8:00 AM - 4:00 PM, America/Sao Paulo timezone.
Enable business hours
To enable the business hour settings for your workspace, follow these steps:
Go to Manage
 > Workspace > Settings > Omnichannel > Business Hours.
Enable the business hours option.
Select the Business Hour Type as Single.
Click Save changes.
Set business hours
To define the business hours, follow these steps:
Go to Manage
> Omnichannel > Business Hours.Select the Timezone from the drop-down menu. Time zones observe daylight saving time, and the agent's availability is updated automatically.
Select the Open Days of the Week according to your needs.
For each selected day, set the Open and Close times.
Once you’re done, click Save.
Now, agents can chat with visitors in real-time only during the defined operating hours.
Multiple type business hours 
Use the multiple type of business hours if you need different time zones and operating hours.
Enable business hours
To enable the business hour settings for your workspace, follow these steps:
Go to Manage
> Workspace > Settings > Omnichannel > Business Hours.Enable the business hours option.
Select the Business Hour Type as Multiple.
Click Save changes.
Set business hours
To define the business hours, follow these steps:
Go to Manage
> Omnichannel > Business Hours. Select the Default business hours option to set default operating hours. Agents without a department or agents with departments that are not connected to any business hour rule, follow the default business hour.
Select the Timezone from the drop-down menu. Time zones observe daylight saving time, and the agent's availability is updated automatically.
Select the Open Days of the Week according to your needs.
For each selected day, set the Open and Close times.
Once you’re done, click Save.
Create new business hours
To create a new business hour, follow these steps:
Go to Manage
> Omnichannel > Business Hour.Click +New.
Fill in the following details:
Enabled: Enables the working hour.
Name: Name of the working hour.
Departments: Select the departments the working hours apply to. All agents assigned to these departments will follow the business hours that you define here. Make sure that the departments are enabled and agents are assigned to them. See Manage Departments for details on the Omnichannel departments feature.
Timezone: Select the timezone. Timezones observe daylight savings time, and the agent's availability is updated automatically.
Open Days of the Week: Pick open days of the week. Each selected day lets you set an open and close time.
Click Save.
The Business Hours page displays the list of all the created business hours. You can edit or delete them as per your needs.
In the Multiple Mode, it's important to note that due to system nuances, while agents are assigned to specific department hours, they may still receive chats from other departments they're associated with, even outside the set hours. For instance, if Mike is in Support (9 AM-3 PM) and Sales (default business hour: 4 PM-5 PM), he'll mainly handle Support chats from 9 AM until 3 PM. However, he might occasionally receive chats from Sales during the Support hours. From 3 PM-4 PM, he will be unavailable for new chats. Thereafter, he'll be primarily available for Sales from 4 PM-5 PM.
We recommend that businesses be aware of this operational nuance and plan their staffing and training accordingly to ensure a consistent customer experience.
If your agent's live chat status shows available or is still enabled when business hours are closed, go to business hour admin settings. Then, disable and enable business hours again.
Display business hours to visitors
You can display your business hours to visitors so they can reach out during the hours in which the agents are available. While you can display the business hours on your platform as per your requirements, you also have the option to display them on the livechat widget if you have installed it for your website.
To display business hours on the livechat widget,
Go to Manage
> Omnichannel > Livechat Appearance. In the Registration Form section, click Enabled to enable this option if you haven’t already.
Provide a message in the Registration Form Message field. The message can welcome your visitors and include your operating hours. For example,
Thank you for contacting us! Our working hours are Monday to Friday, 8AM - 4PM.Click Save changes once you’re done.
The message appears at the top of the Livechat widget’s registration form when visitors access it.
Display offline form
Additionally, you can display an offline form that visitors can use to reach you outside of your business hours or when no agent is available. To do this, follow these steps:
Go to Manage
> Workspace > Omnichannel.Go the Livechat section and enable the Display Offline Form option.
Enter a Title for the offline form. For example,
Leave a message.You can choose a Color for the offline widget and form.
Enter a message in the Instructions field. For example,
Out of operating hours! Leave a message and we will get back to you soon. Or contact us during our operating hours: Monday to Friday, 8AM - 4PM.In the Email Address to Send Offline Messages field, enter an email address to which the messages will be sent. Ensure that you have configured the email settings for your workspace.
In the Offline Success Message field, enter a message that is displayed to visitors once they send their message. For example,
Thank you for contacting us! We've received your message! We will get back to you soon! :)Scroll down to find the Send Livechat offline messages to a channel option. Enable this option to receive the offline visitor messages to a channel.
In the Channel Name field, enter the name of the channel to which the offline messages are sent. For example,
general.Click Save changes once you’re done.
The offline form that is displayed to visitors looks something like this:
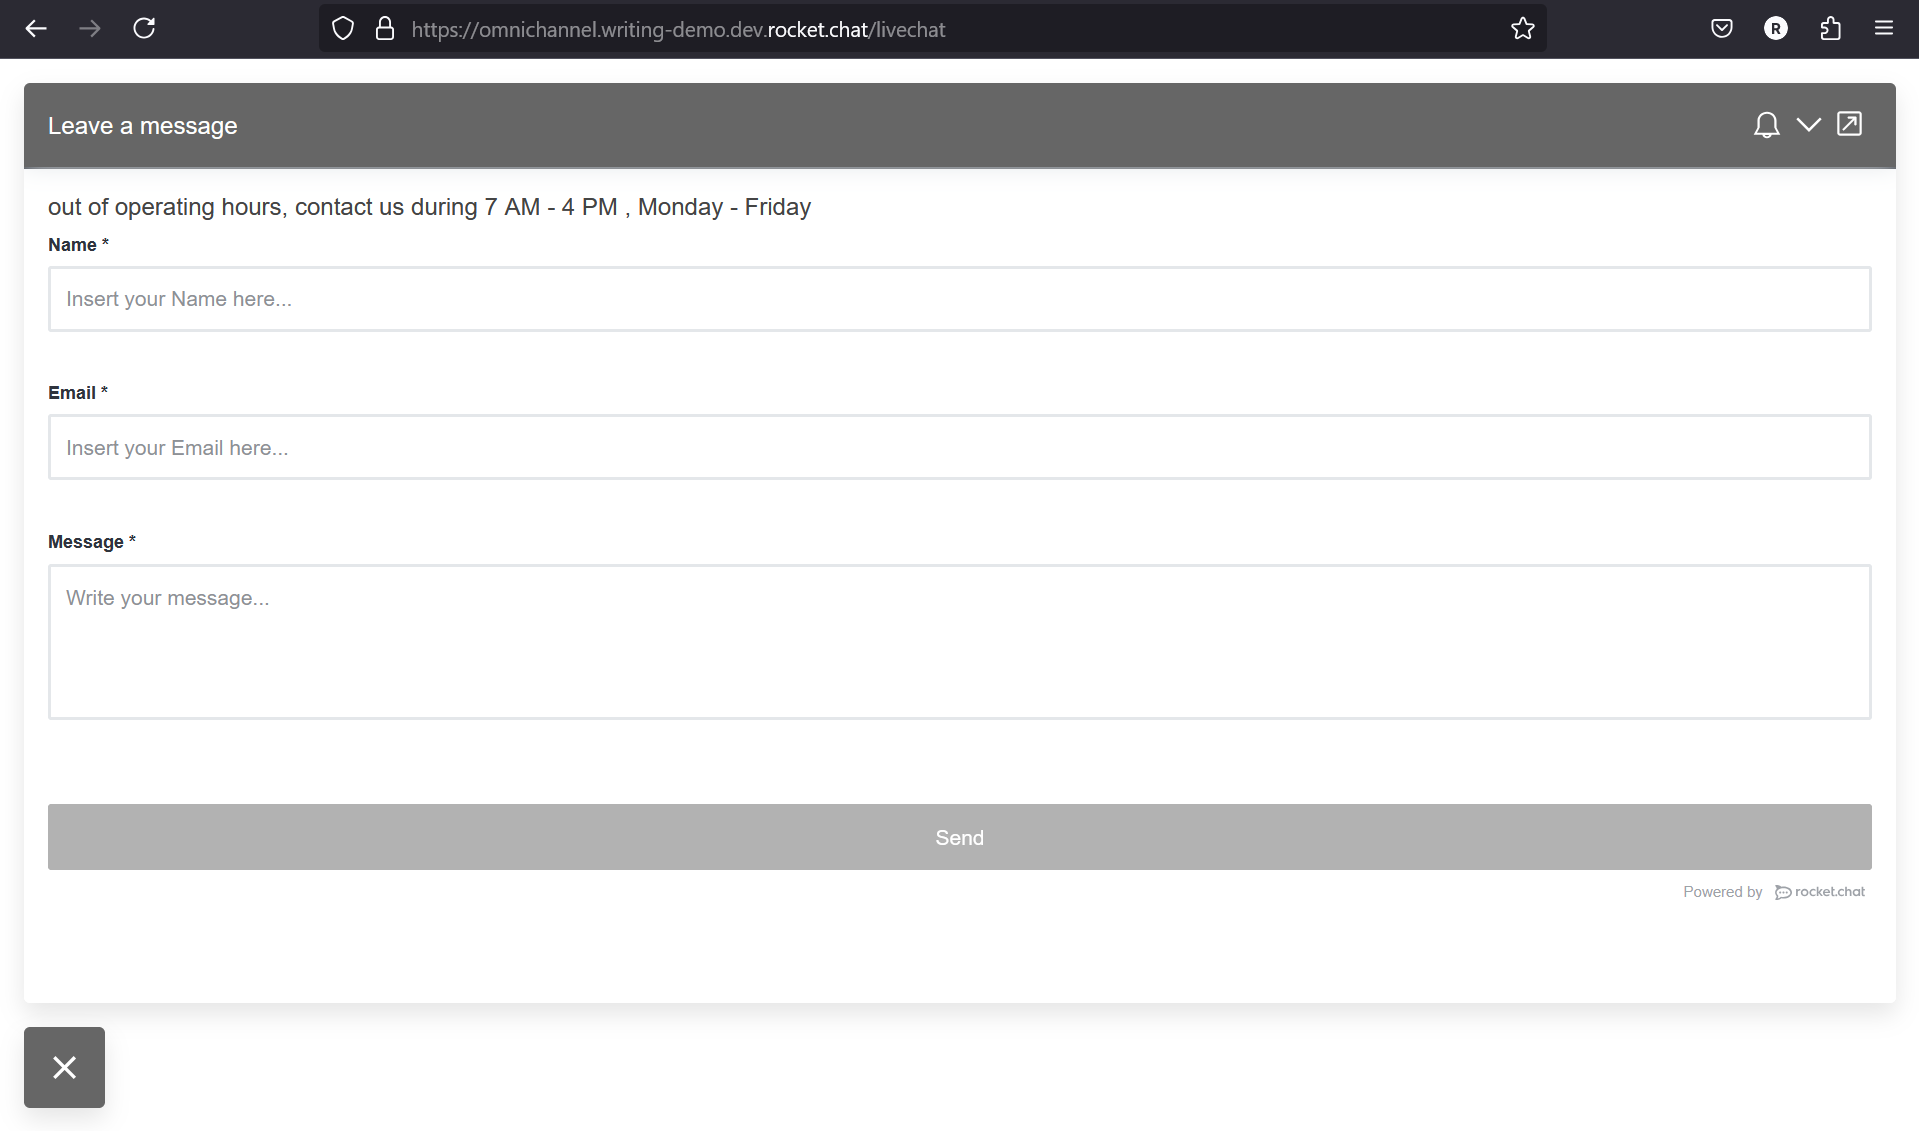
The visitors must enter the name, email address, the message. You will receive their contact information and messages in the email inbox or the channel that you have selected previously. You can then reach out to them via the email address the visitors have provided.
The following videos show the business hours and offline registration form settings: